More revenue doesn’t have to mean more hassle. At least that’s our goal—to help you earn more without time-consuming or complicated efforts. In this case study, we’ll explore how additional monetization can boost your ROI and overall profit.
Earlier, we covered two types of extra monetization you can apply to your campaigns: a push subscription tag and a back button script. This time, we ran a push campaign to see how standalone push subscriptions can strengthen a push campaign.
Without further delay, let’s push forward to the heart of our case study.
Getting ready for the launch
For our test, we chose a sweepstakes offer from our partner affiliate network, CpaRoll. Below are the full setup details of our campaign.
Format: Push
Vertical: Sweepstakes
Bid model: SmartCPC
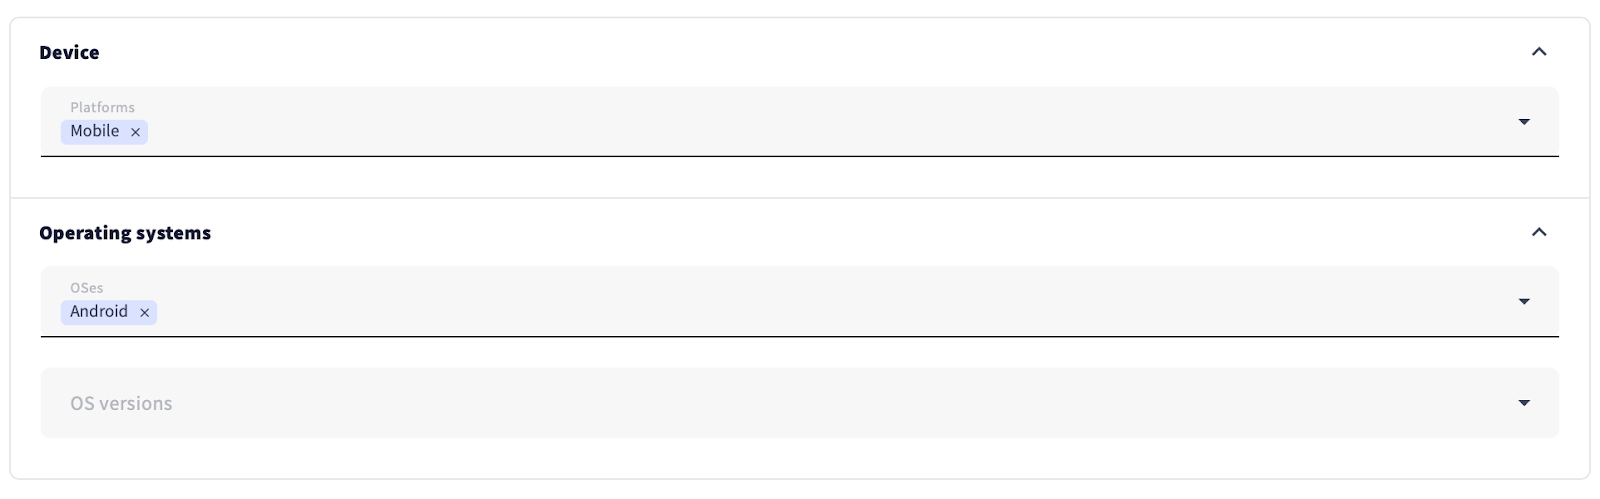
Device: Mobile
OS: Android
GEO: US
Offer: US – TrendnDaily – $1000 CashApp Card – CPL 1753
Payout: $2.4

Implementing a push subscription tag
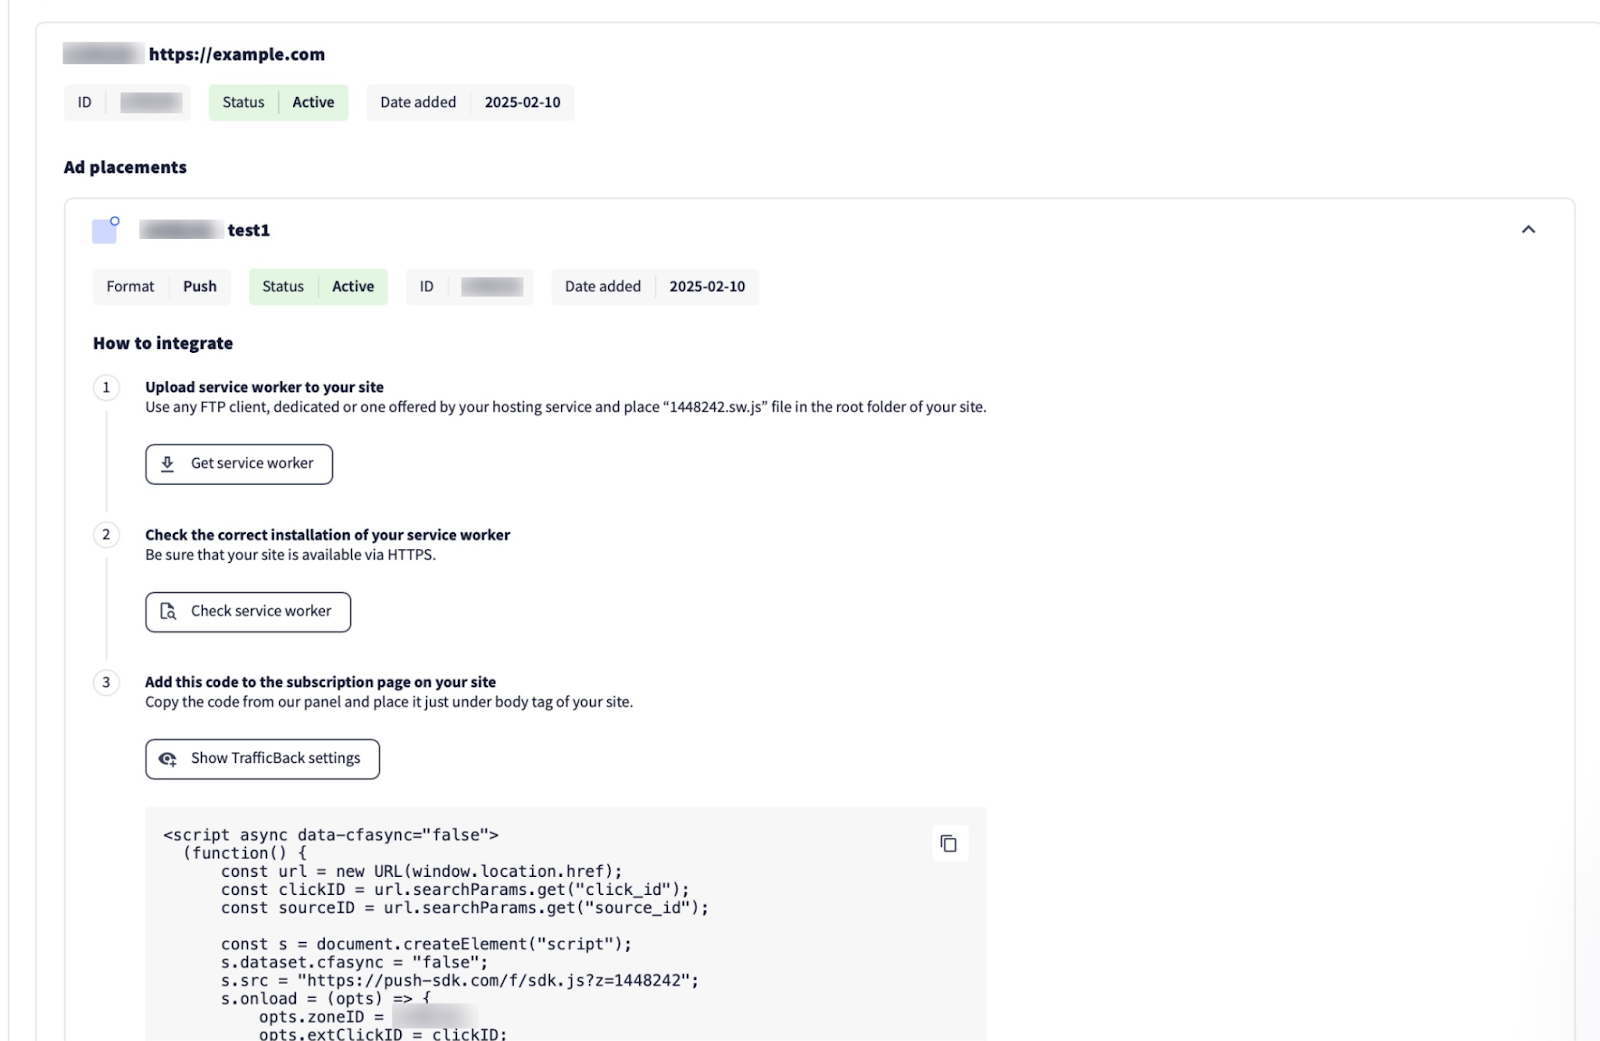
If you don’t yet have a publisher account with RollerAds, you’ll need to create one first, as you won’t be able to add the push subscription tag to your pre-lander without it. If this is your first time adding the tag, follow the step-by-step instructions in the article we published earlier. Or contact our managers for guidance.
We followed the same process ourselves: obtained the code and added it to the subscription page on our pre-lander.
In one of our articles, we explained the role of pre-landers, how to use them, and how to design one. If you need a quick refresher, head over here.
Time to launch the campaign
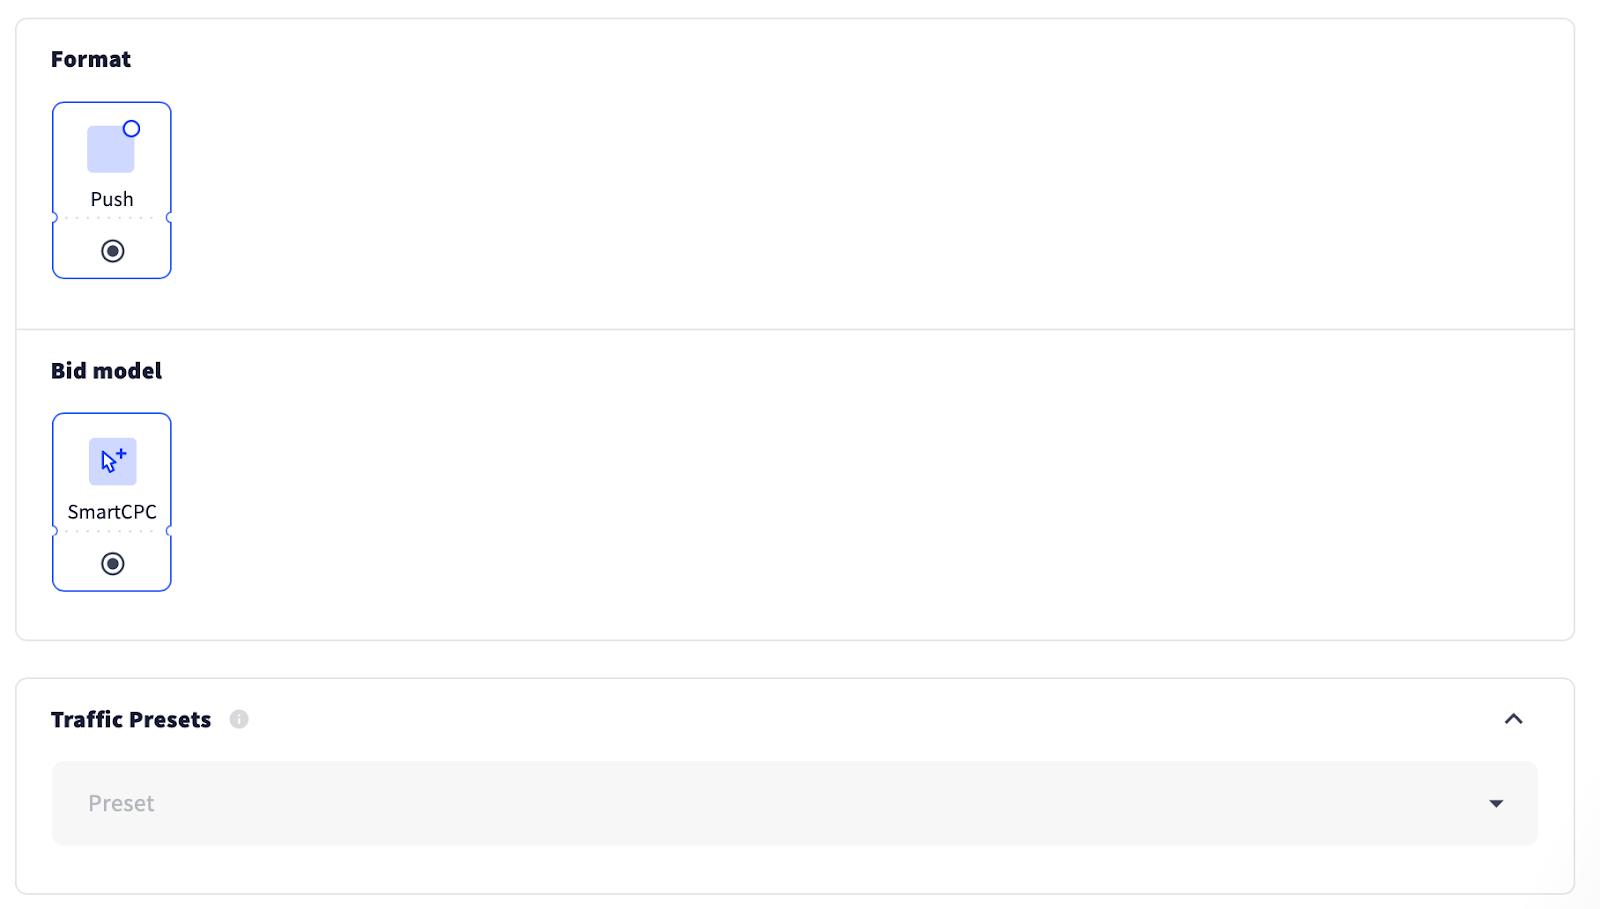
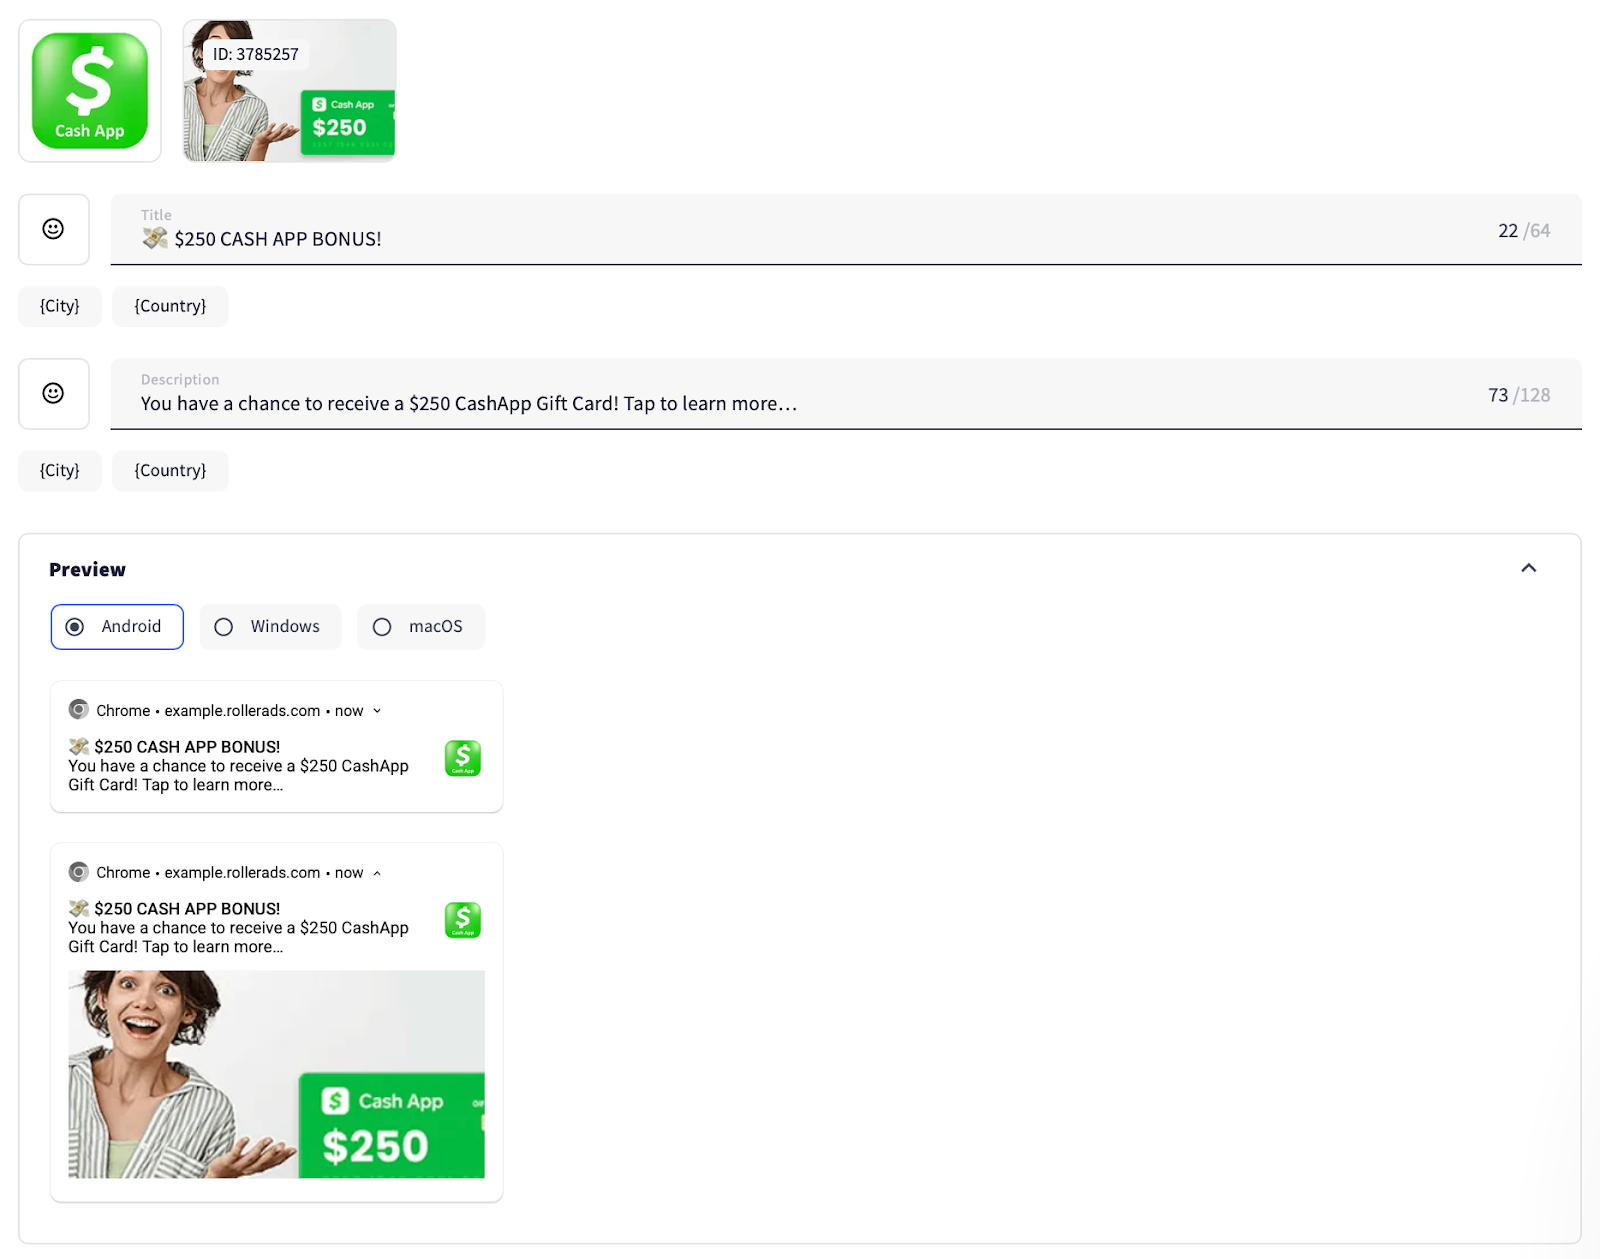
The offer is selected, the push tag is all set to boost the campaign’s earnings, and now it’s time to launch! As usual, we kicked things off by choosing the ad format and bid model.
We named the campaign and pasted the target URL.

Then we added creatives. We always recommend our users to add up to 10 creatives (the maximum allowed). This gives you the leeway to juggle them and optimize performance by blocking the underperformers and adding more of those that deliver results.
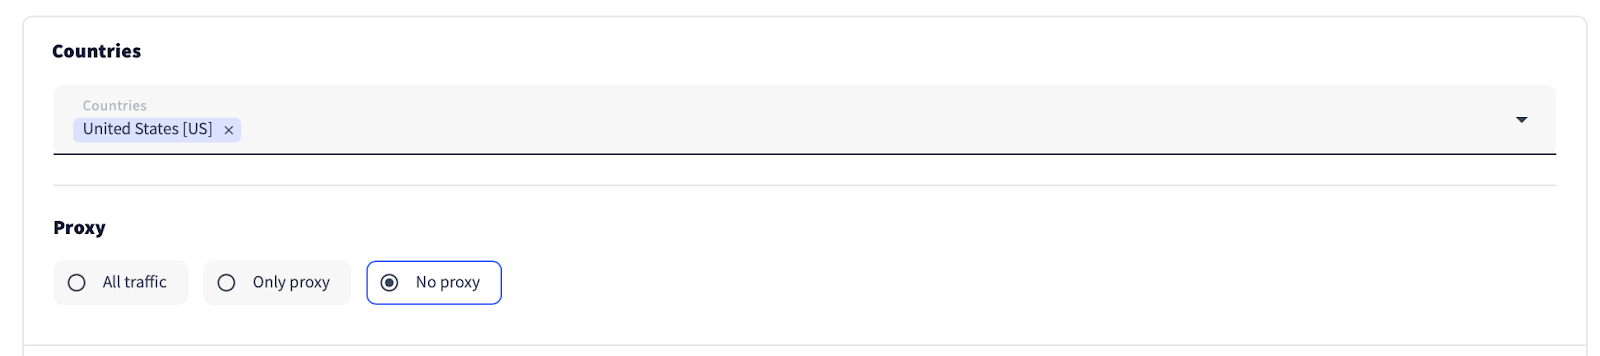
According to the offer’s KPI, the US is the GEO of demand, so we added this GEO and disabled proxy traffic.
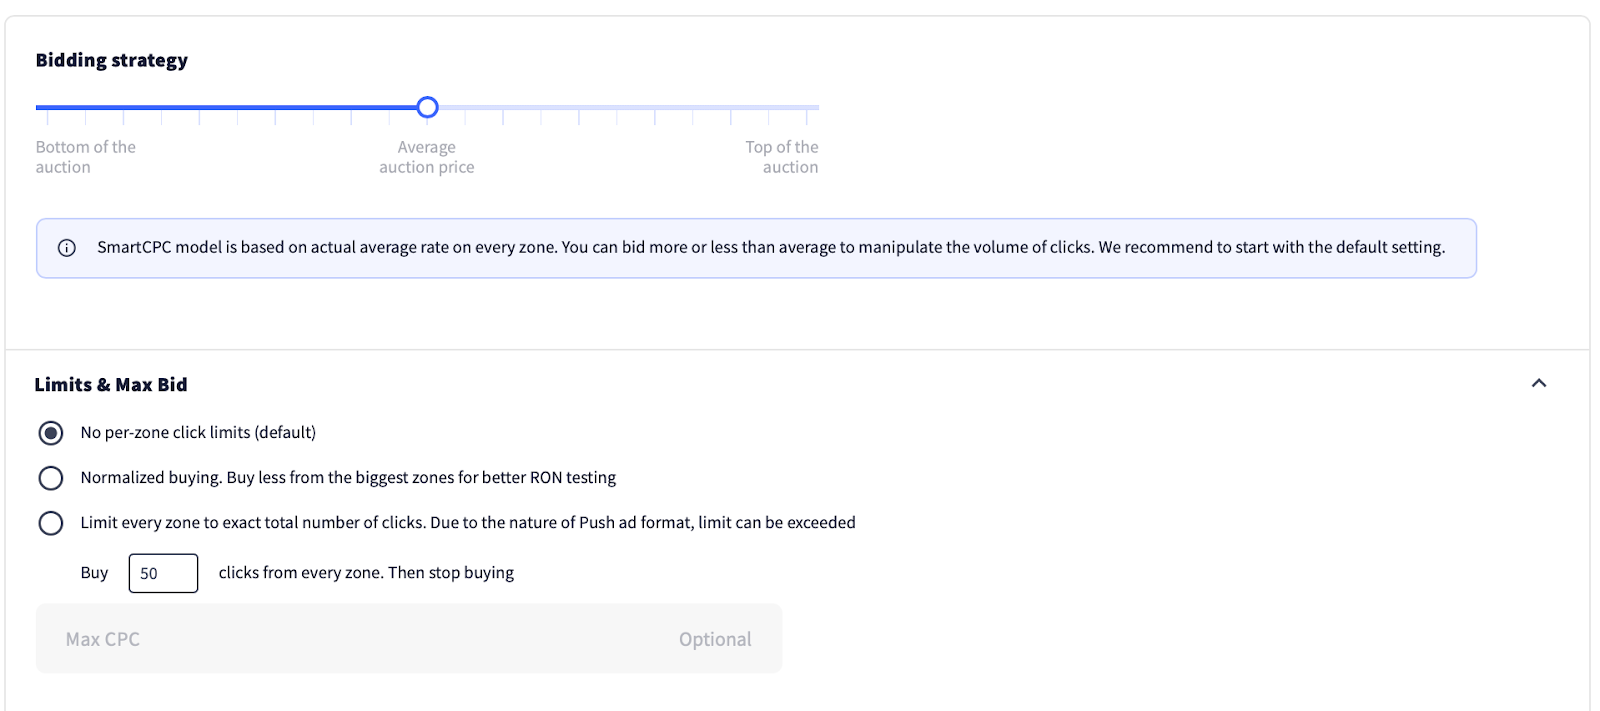
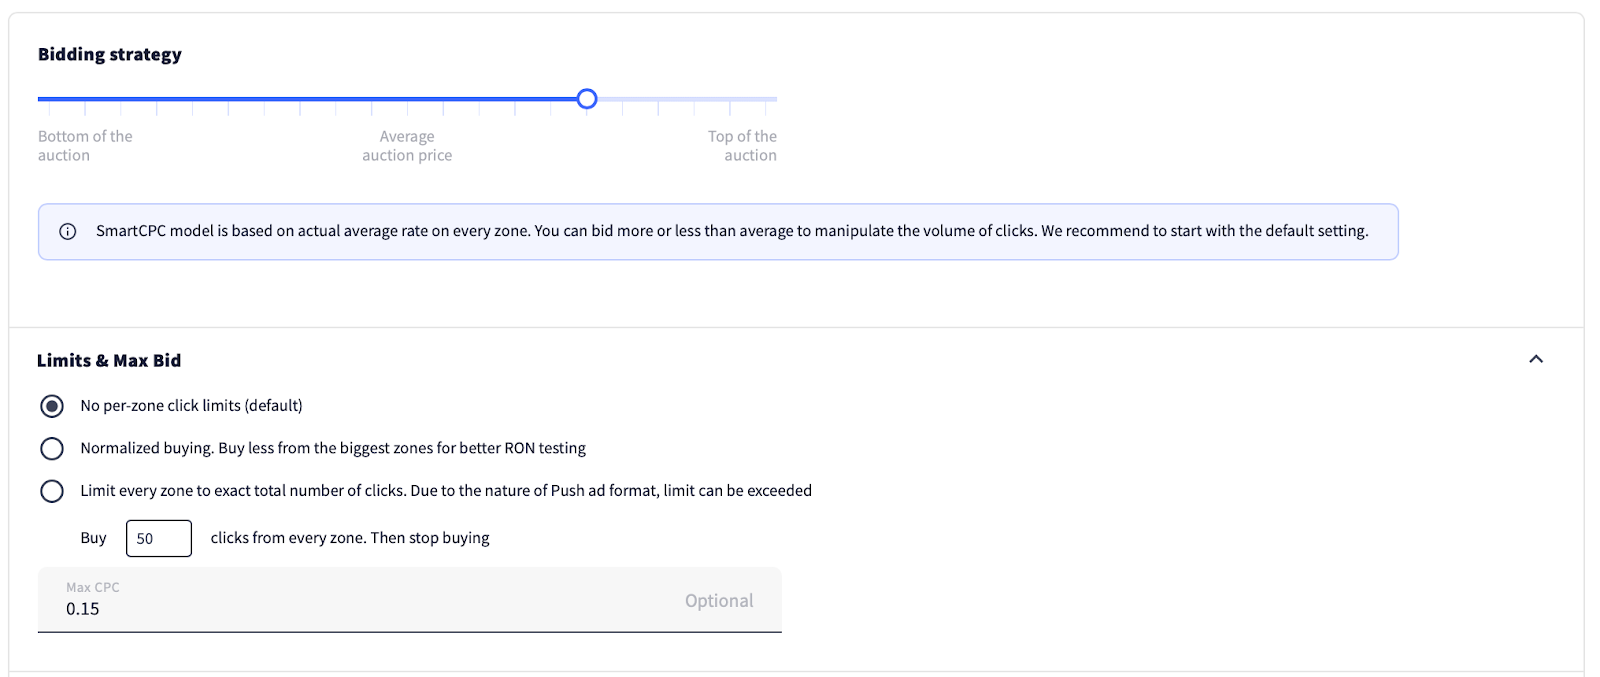
We left the bidding strategy at its default (average auction price) and, to our big regret, didn’t set a maximum bid. Predictably, we paid the price later with higher-than-expected spend.
Take it from us: never skip setting a maximum bid—it can save your budget and keep your campaign on track.
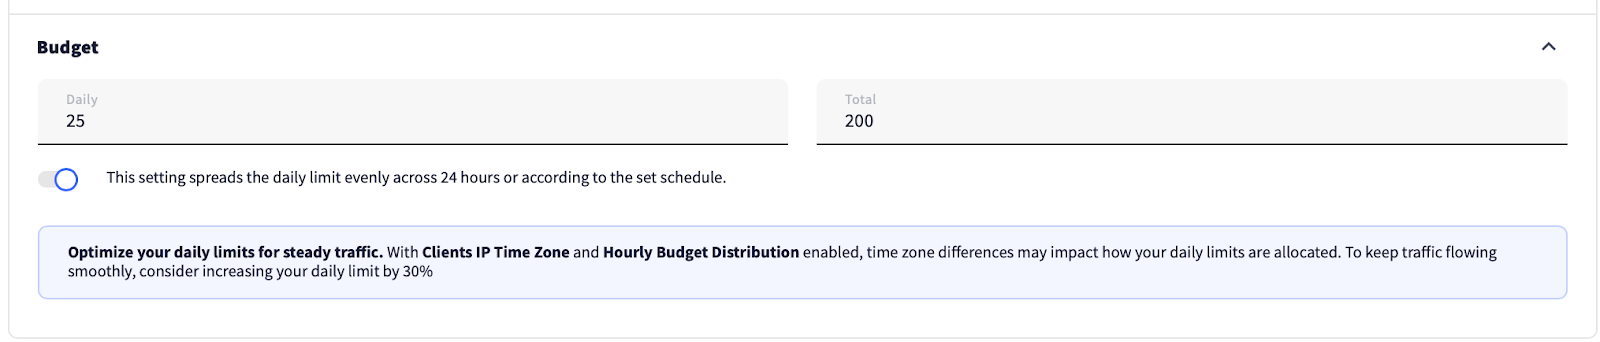
Then we set the daily and total budgets—another step never to be overlooked.
We chose the most active subscription age of 0-3 days and kept the default frequency capping—one exposure per 24 hours.
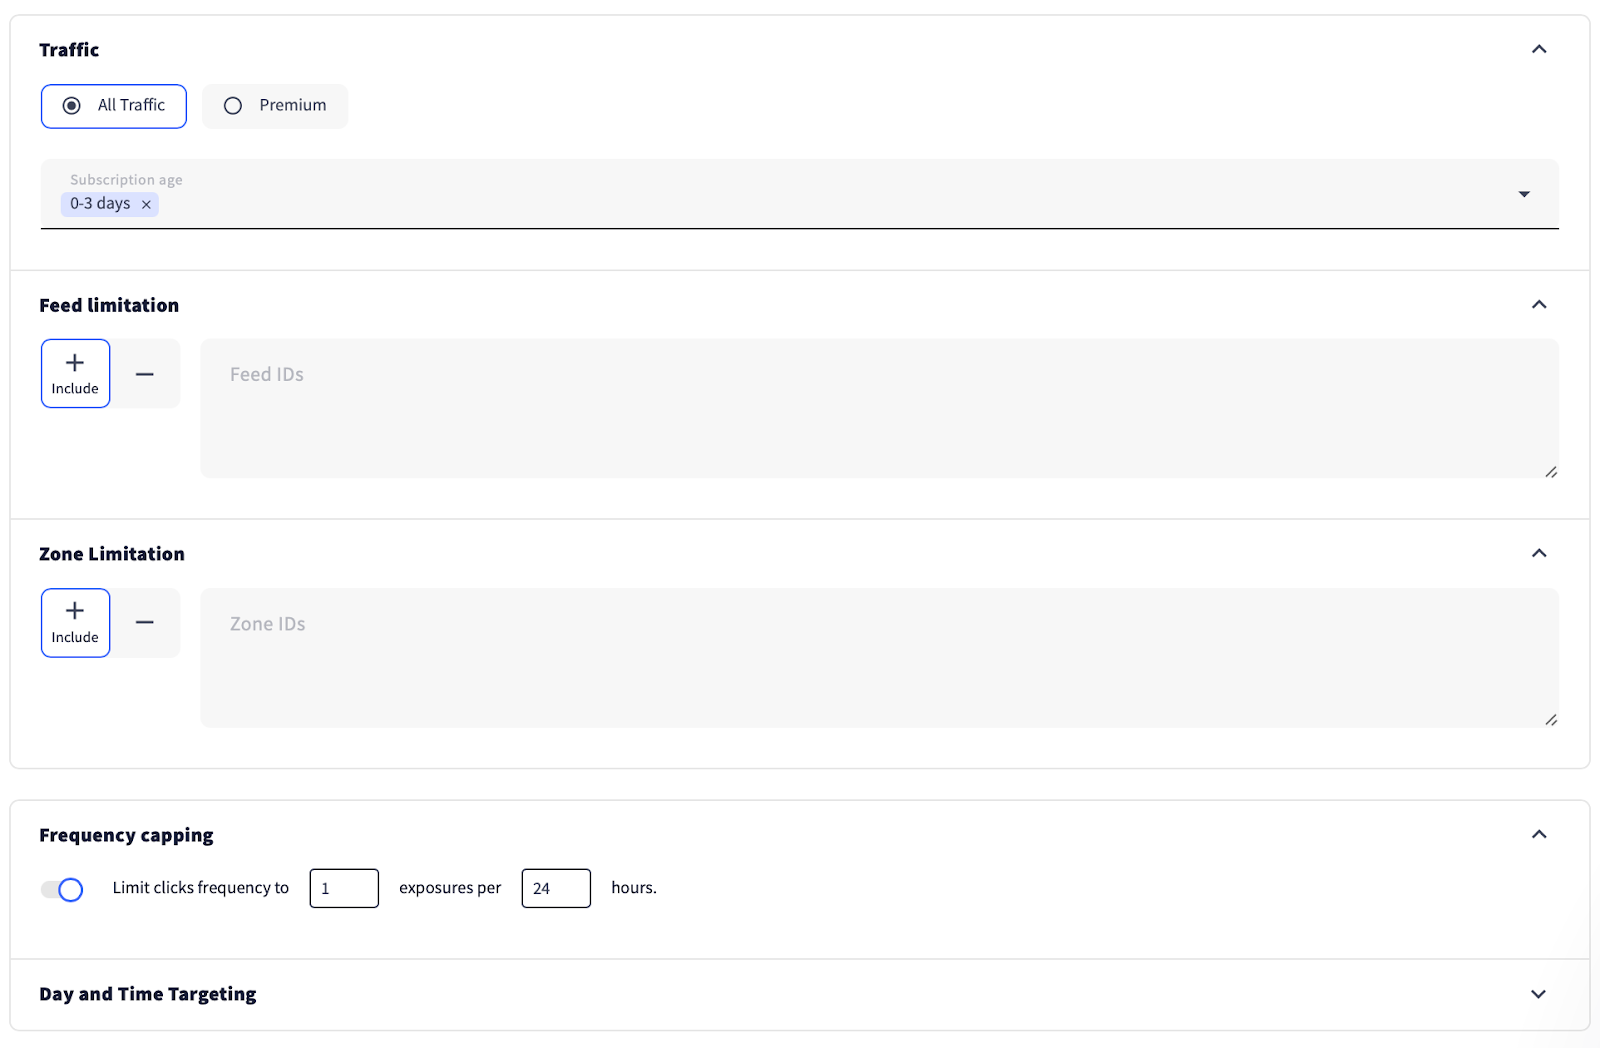
It’s also important to set the device and OS targets.
Once the campaign was configured, we saved changes and submitted it for moderation.

Optimization tweaks
Every campaign needs a little fine-tuning, and the sooner you dive in, the better—once the traffic starts rolling in. So, let’s get straight to it.
Day 1
As soon as your campaign starts getting traffic, check the LP CTR to make sure your pre-lander is working correctly. If it shows 0% despite the number of clicks, it means your pre-lander doesn’t work and needs to be fixed.
In our case, even with a good LP CTR percentage, the campaign underperformed due to very expensive clicks—our earlier mistake of not setting the maximum bid.

That was the moment we realized our mistake and rushed to fix it. We set $0.15 as the max CPC and moved the scroller closer to the top of the auction.
Day 2
The bid finally normalized, and we got down to optimization. We started by blocking the zone that showed the worst results.
Day 3
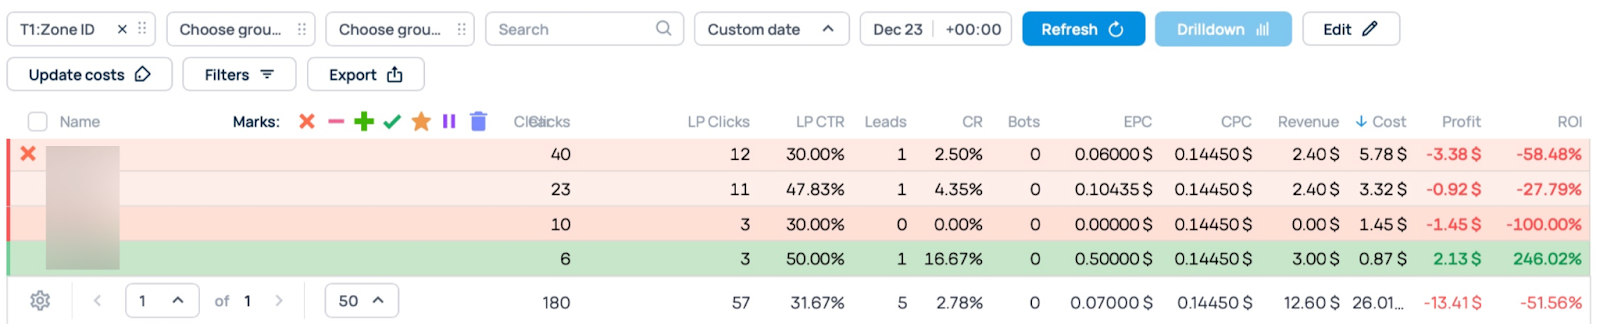
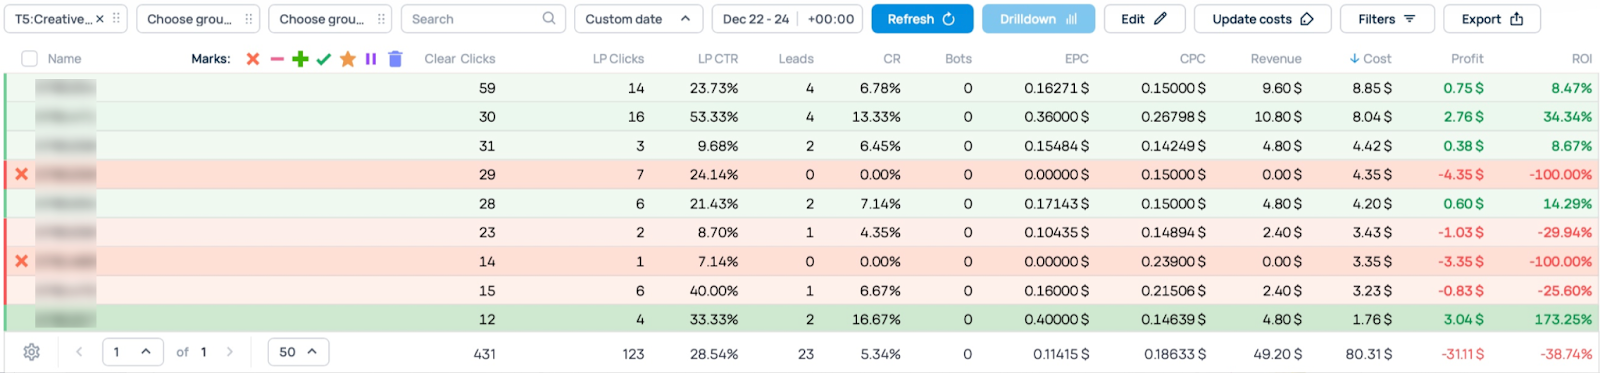
In our tracker, in the tabs on the top, we selected the dates covering the entire campaign period and analyzed the performance of our creatives, which led us to say goodbye to two of them due to low CR and no conversions.
Day 4
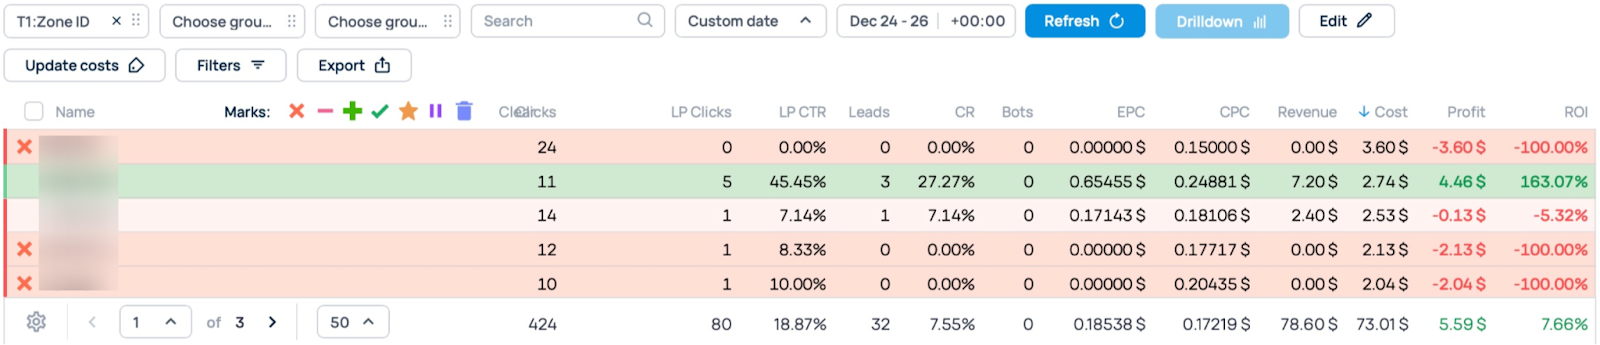
We finally got to zone optimization and blocked the ones with 0% LP CTR.

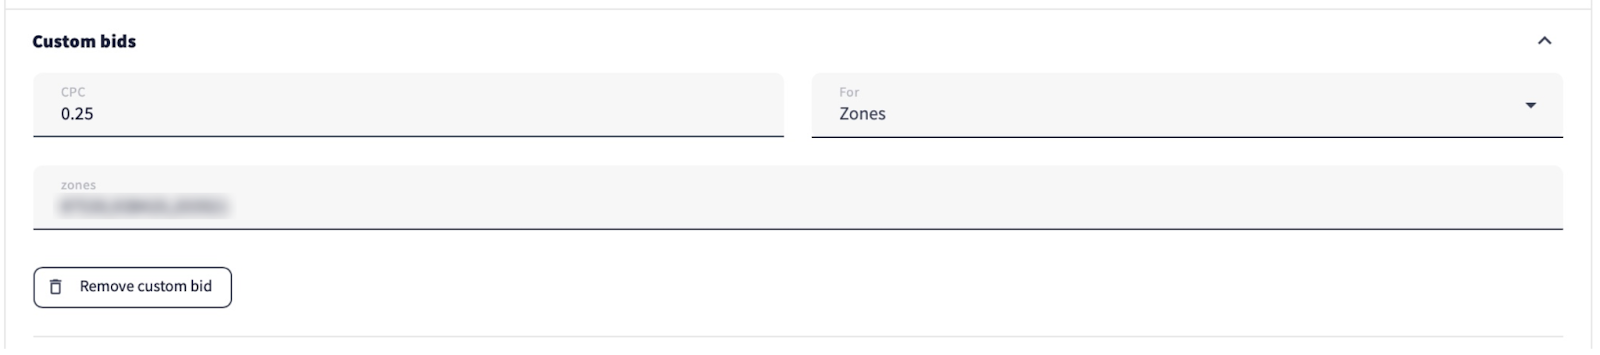
To get more traffic, we decided to set custom bids for the zones that had conversions.

Day 5

Predictably, the average bid increased due to the custom bids we set earlier. But unfortunately, we didn’t get the desired traffic, so we backed off and removed the custom bids.

We also blocked the zones with no conversions.
Days 6-7
The campaign was paused and received no traffic. After all, media buyers are only human and need their well-deserved break 😴
Day 8
It was time to get back to work, rebooted and ready to go. We blocked the feeds that had brought no conversions during the five days of the campaign.

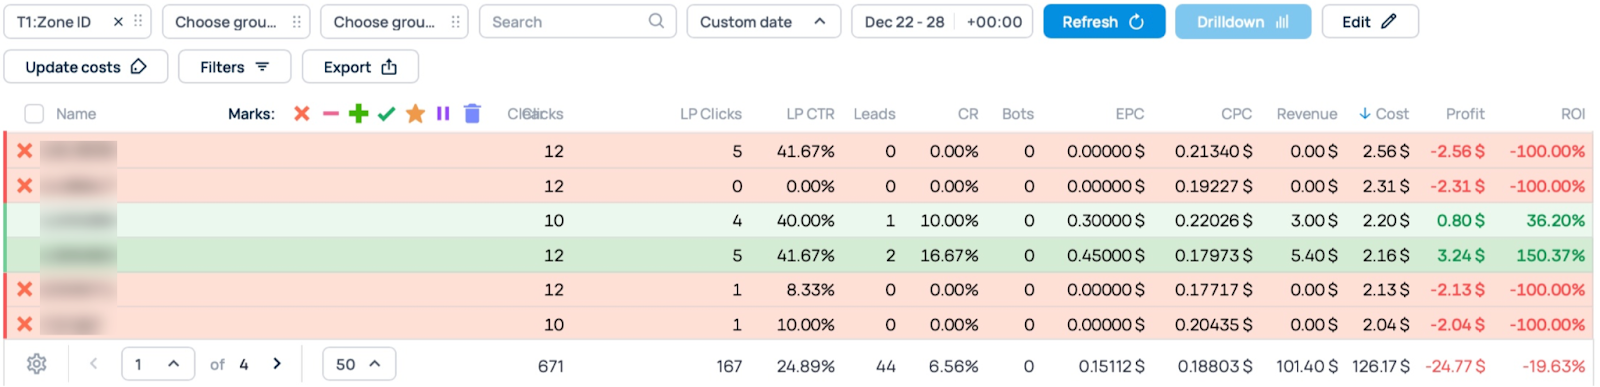
With the same date selection, we fine-tuned the zones, blocking the ones with no results.
Day 9
By choosing new dates, we continued blocking non-performing zones.

Day 10
It was the final day of our campaign lifecycle—we waited for the entire budget to be spent and then summed up the results.
Case study results
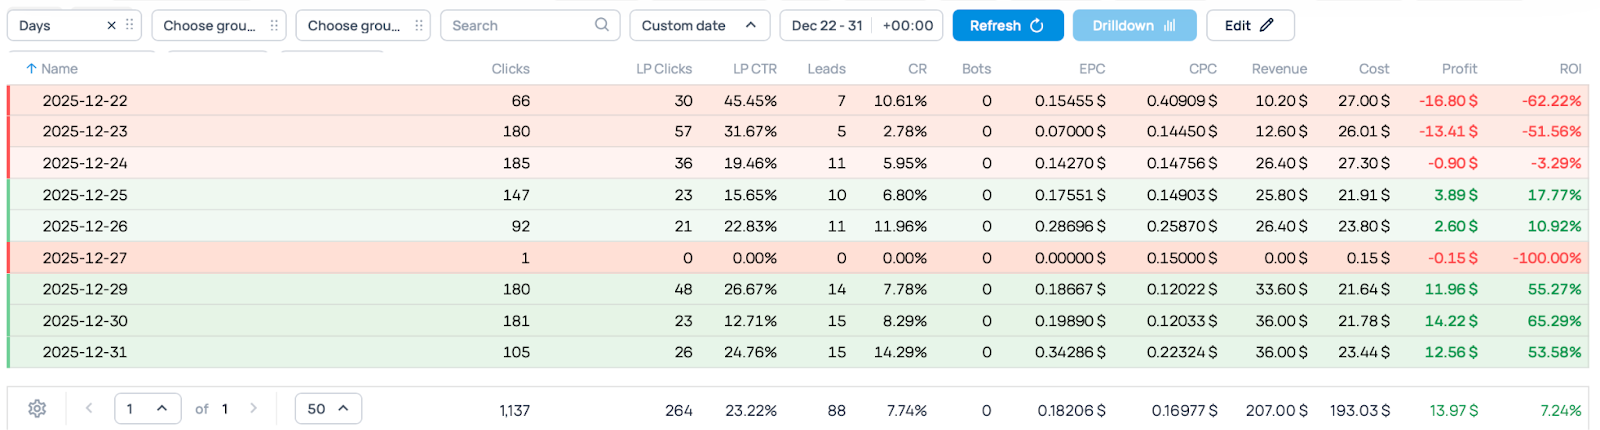
Over 10 days of traffic, our campaign achieved the following results.
Total cost: $193.03
Total revenue: $207
Profit: $13.97
ROI: 7.24%
Push subscription tag outcomes
And now, let’s see whether the push tag we implemented on our pre-lander actually enhanced our earnings.
The tag was working alongside the main campaign and thanks to it, we earned an additional $37.44 and boosted ROI by 19.40%!
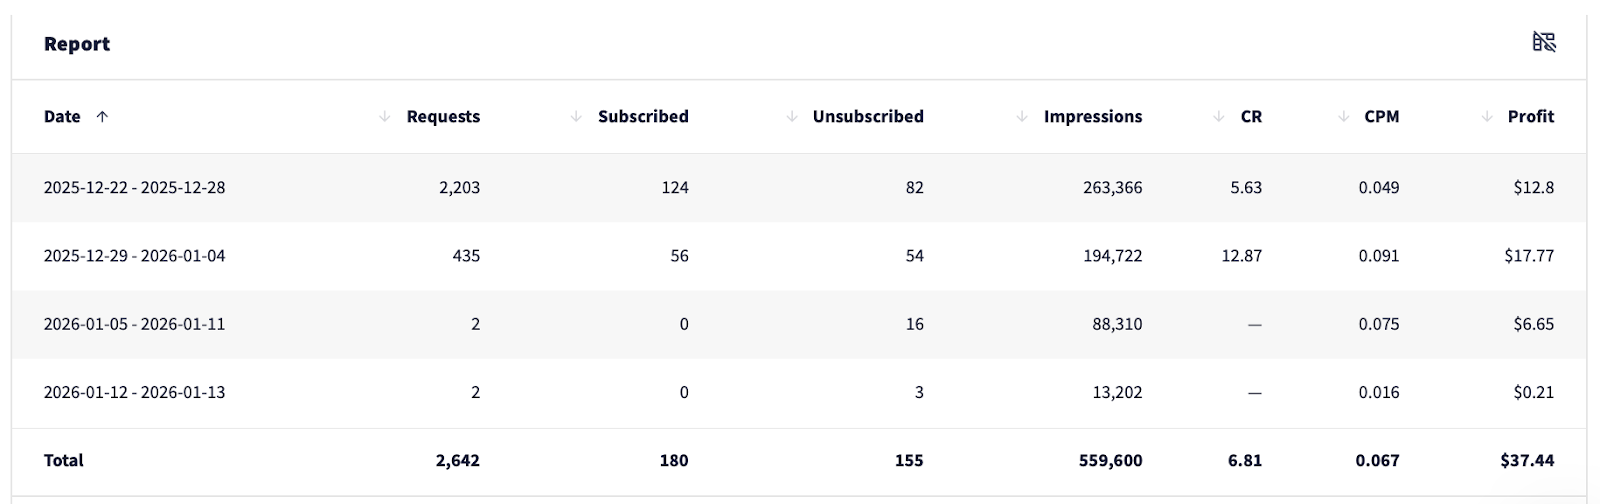
Even when the traffic stopped, subscriber monetization continued to generate revenue.
All in all, here’s a summary of our campaign results.
Total cost: $193.03
Revenue: $207
Revenue from the push subscription tag: $37.44
Total revenue: $244.44
Total profit: $51.41
ROI ≈ 26.64%
Wrapping up
Thanks to the push subscription tag, we managed to improve ROI by 19.40%. Now imagine the scope of extra earnings if you multiply the cost and the number of campaigns you run—it can grow exponentially.
So why limit your earnings if you can get more? We highly recommend adding the tag wherever possible to multiply your earnings. And if you have any questions or want to clarify any steps in the case, get in touch with us—we’ll gladly help you sort them out.
Happy extra earnings!