Imagine launching a new campaign and staring at a blank setup page—not knowing which parameters to enter, what bid model to choose, how high your bid should be, or which zones to target. Now imagine having a ready-made solution that eliminates all that guesswork: a dedicated kit for each campaign that tells you exactly what to set, where to start, and how to launch with confidence. You simply open the kit, plug in the data provided, and you’re done. Your campaign is ready to take off—you just monitor and optimize. Sounds good? Then campaign kits are exactly what you need.
In this article, we’ll briefly walk you through what campaign kits are and what they include. After that, we’ll use one kit to launch a real campaign with further optimization, so you can see with your own eyes how it all works. Let’s get started.
What exactly are campaign kits?
Campaign kits are out-of-the-box solutions that help you launch campaigns prepared. They are created by RollerAds experts who have affiliate marketing down to a science. In our campaign kits, you’ll find only legitimate solutions—all thoroughly tested before being shared with users, and designed for the best-performing combinations of verticals, ad formats, and bid models.
They’re not a silver bullet, but they are an effective assistant when it comes to saving time and budget while testing new grounds and optimizing campaigns. Keep in mind that they won’t replace your effort—but they will make the process much easier.
What’s inside each campaign kit?
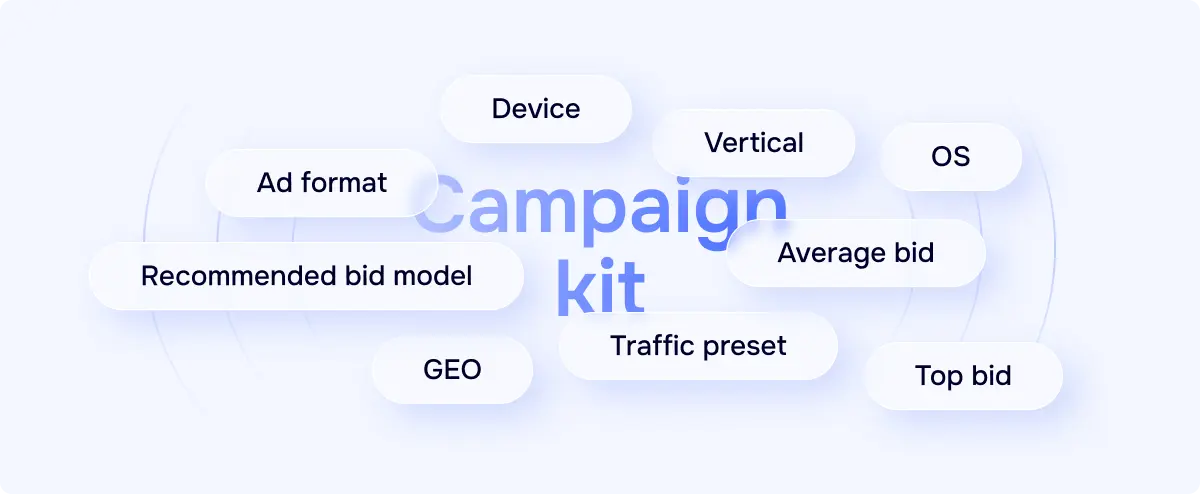
Each campaign kit is tailored to a specific vertical and GEO and includes the recommended bid model, the average and top advised bids, and a traffic preset. The latter is especially important, as it simplifies campaign optimization. Traffic presets are ready-to-use whitelists of the best-performing zones and feeds within a specific vertical and GEO. With presets, you skip the manual sorting step because our team has already grouped, prepared, and tested the best selection.
So, using campaign kits means launching robust and well-prepared tests, but it’s still important to watch and optimize your campaigns, as even among the winning zones there can be underperformers. In our example below, we did exactly the same: launched a campaign with the out-of-the-box campaign kit and fine-tuned it for even better performance.
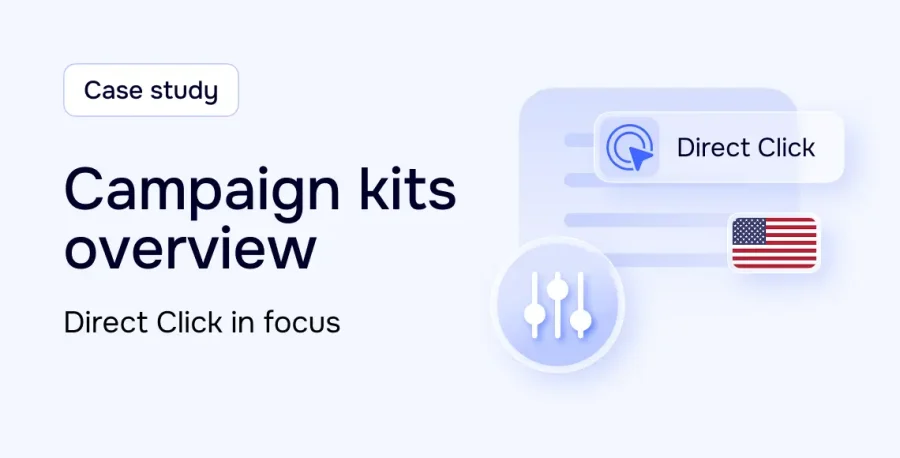
Case study: Campaign kit launch
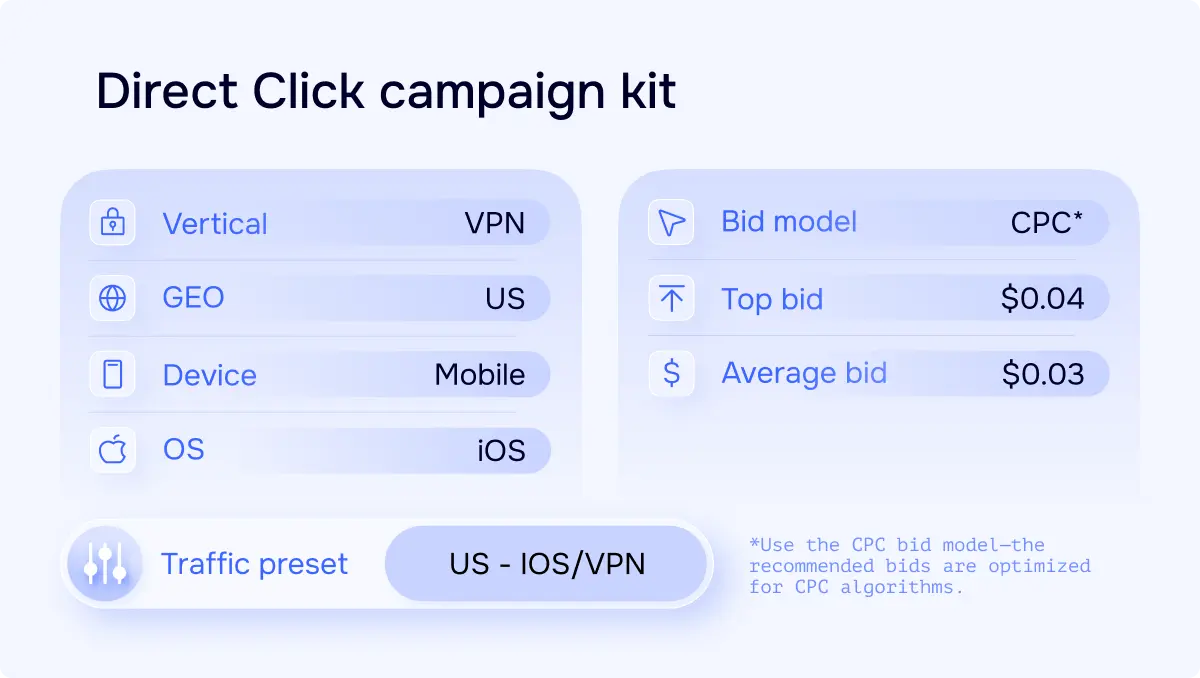
For this example, we used a VPN offer with the following parameters:
Vertical: VPN
GEO: USA
Device: Mobile
OS: iOS
Payout: $18
And we used a campaign kit configured specifically for VPN mobile campaigns in the USA and the Direct Click format—one of our top performers.
Campaign setup stage
Let’s roll with our campaign. We picked the Direct Click ad format and the СPC bid model. After that, in the traffic preset tab, we found the preset indicated in our campaign kit: US – IOS/VPN 🇺🇲.
It’s important to use the CPC bid model here, as all bids were specifically collected to work with CPC algorithms. Make sure to select the correct bid model when setting up your campaign.
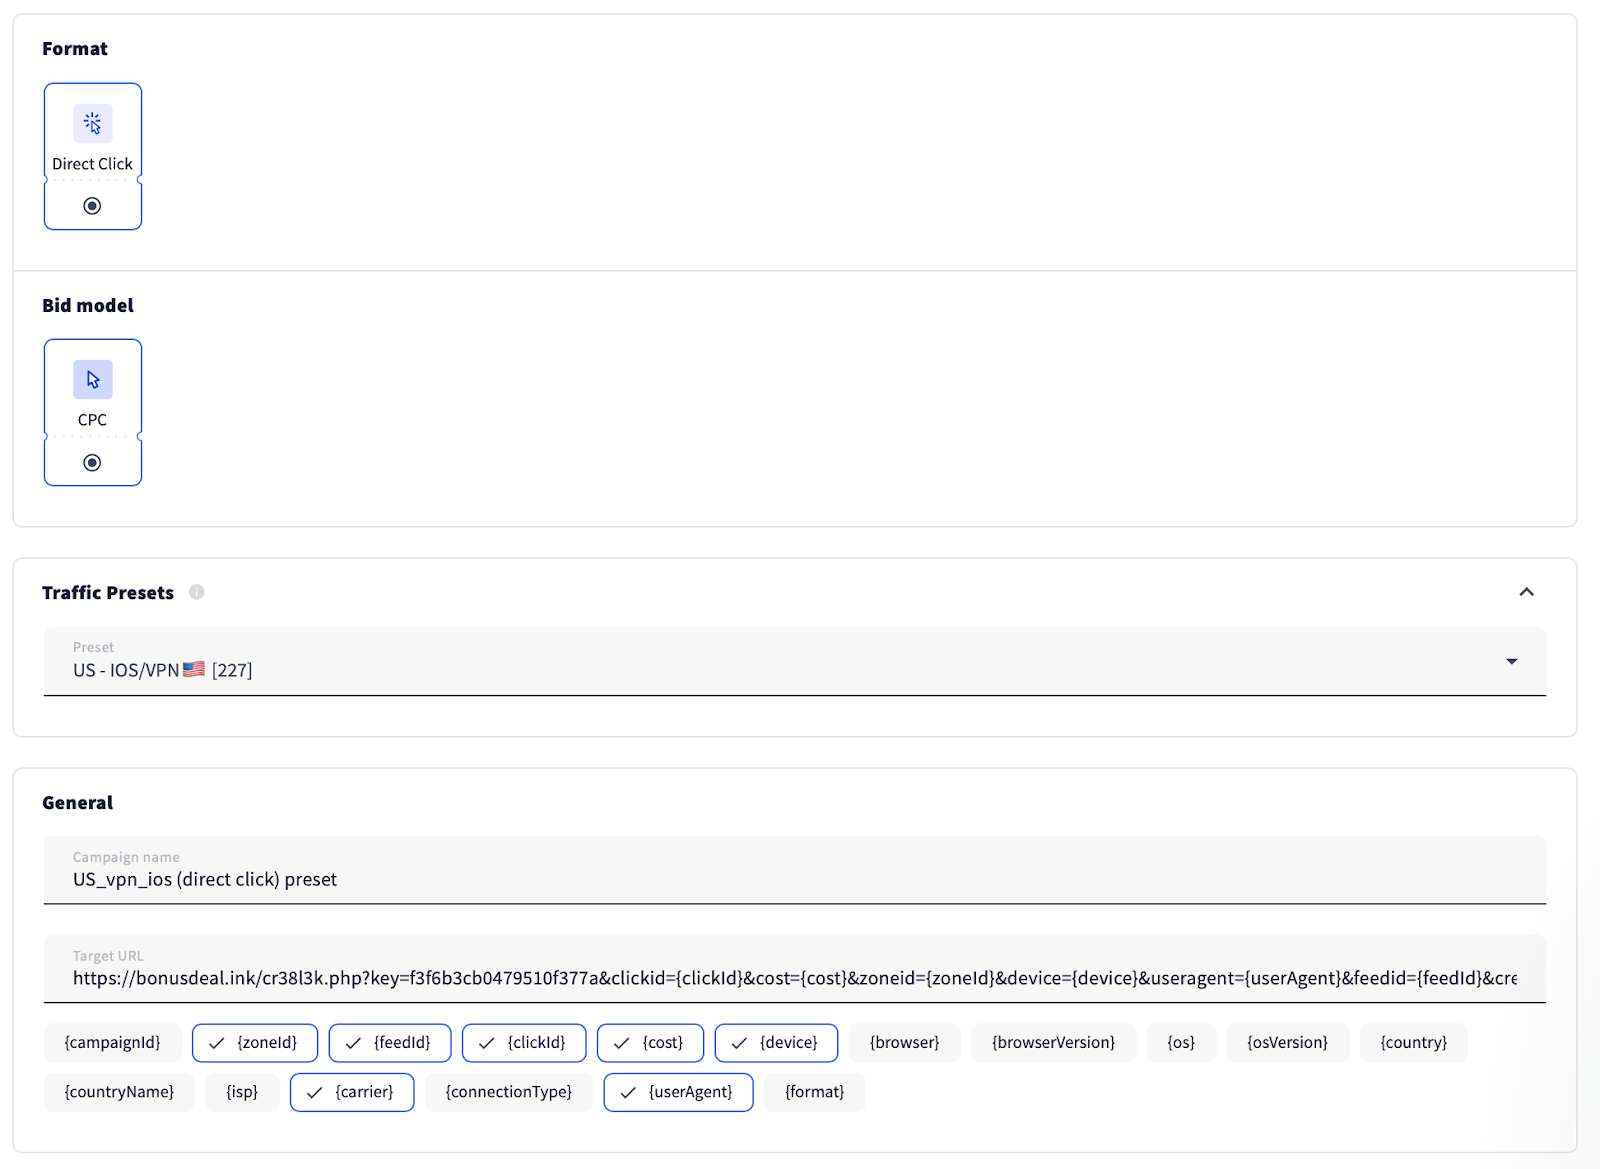
Continuing the setup, we named our campaign and added the target URL.
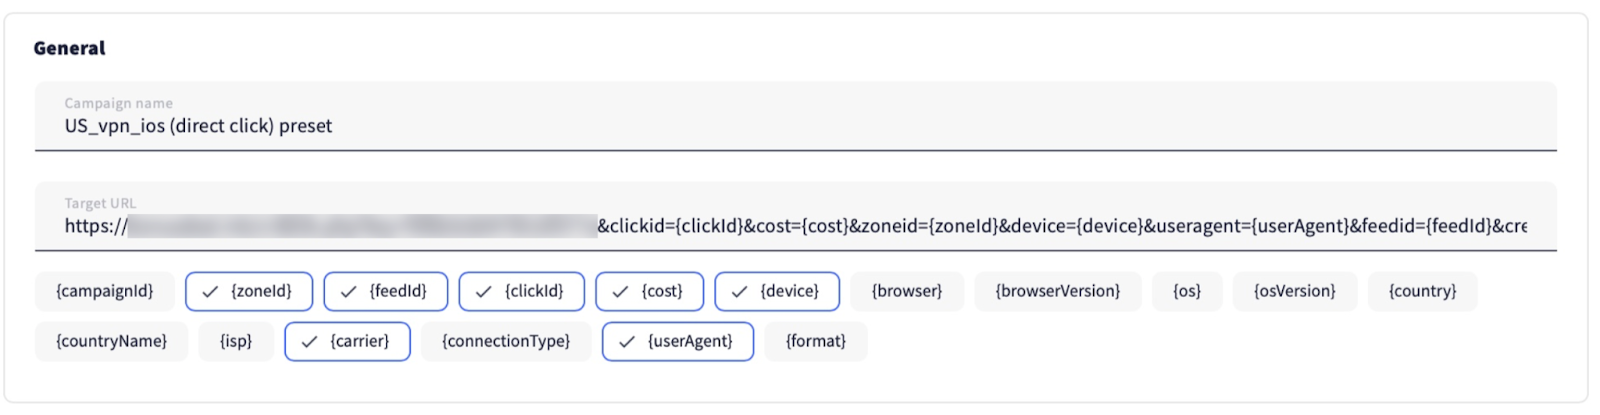
We selected the required GEO and initially set the average bid to create room for increasing it later.
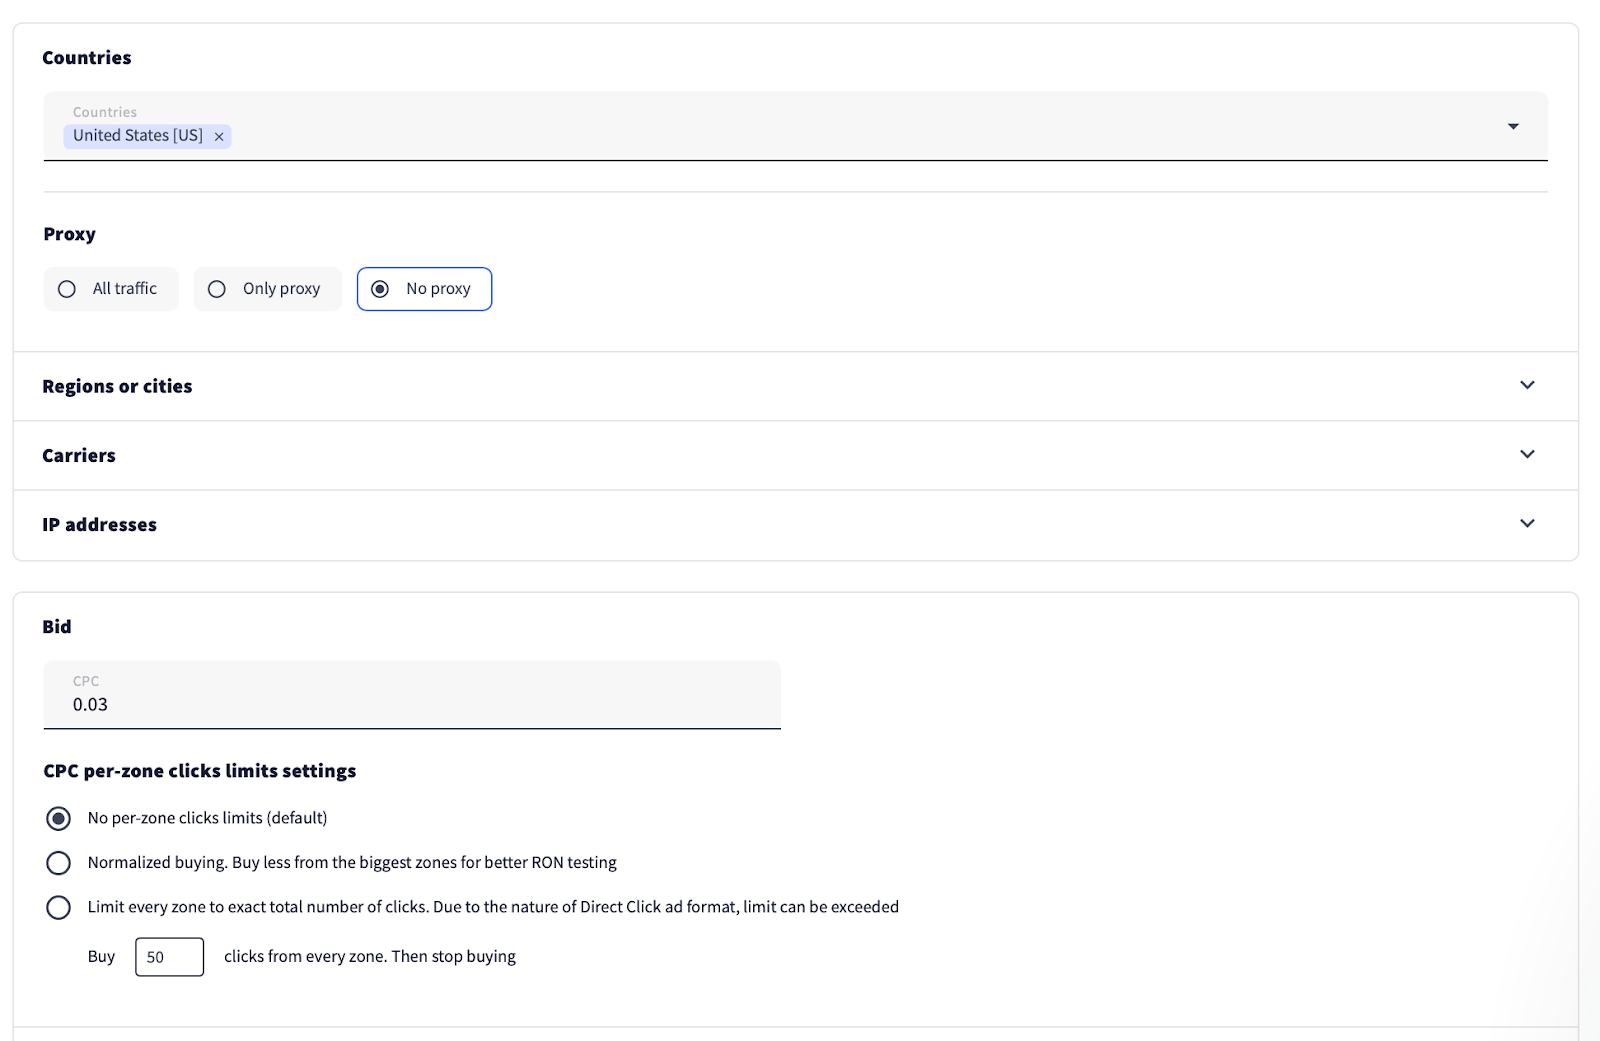
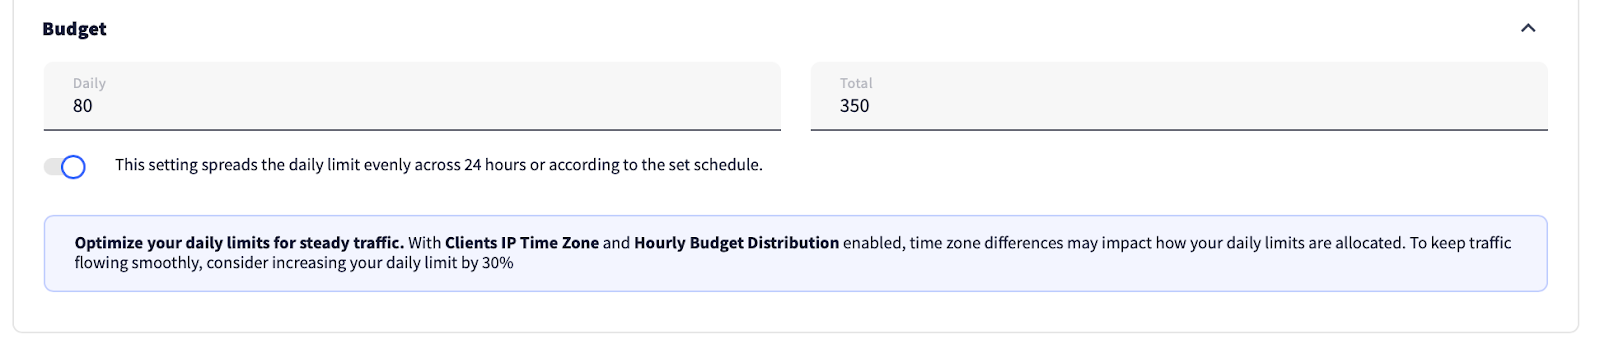
One important thing to note: you need to set a daily budget, because you don’t know how much traffic is included in the preset or how fast your budget will be spent. You can also set a total budget, but unlike the daily budget, this is optional and depends entirely on your preference.
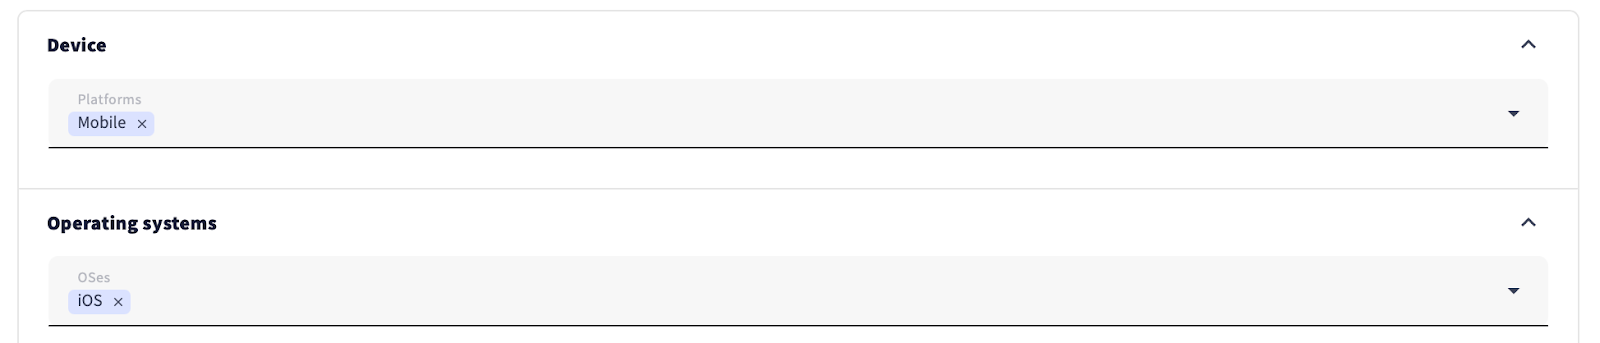
Next, we entered the targets specified in our offer and in the campaign kit, then saved the campaign and submitted it for moderation.

Even though each traffic preset acts as a whitelist, not all channels will perform well for your campaign. So, optimization is still necessary, just like with any other campaign. Speaking of optimization, let’s get to work.
Tweaking the campaign for better results
Day 1
Based on the first day of the campaign, we noticed that one of the zones was generating a lot of traffic but no conversions. We decided to block it.

We also noticed in the feed statistics that each feed performed differently, even though they had the same bid.

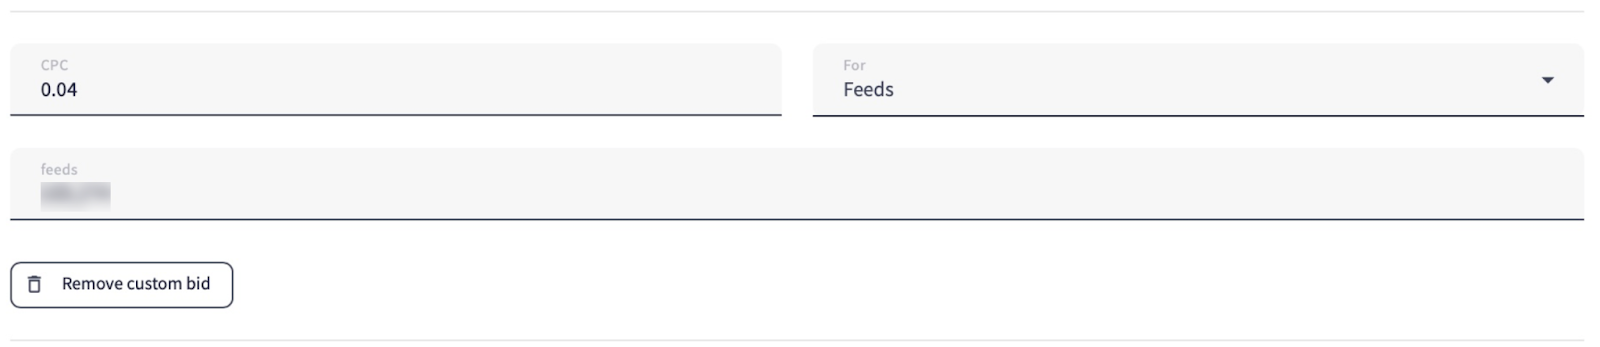
That’s why we decided to set custom bids:
1. The star-marked feed in the screenshot above generated a lot of traffic but was running at a loss. We decided to lower its bid.
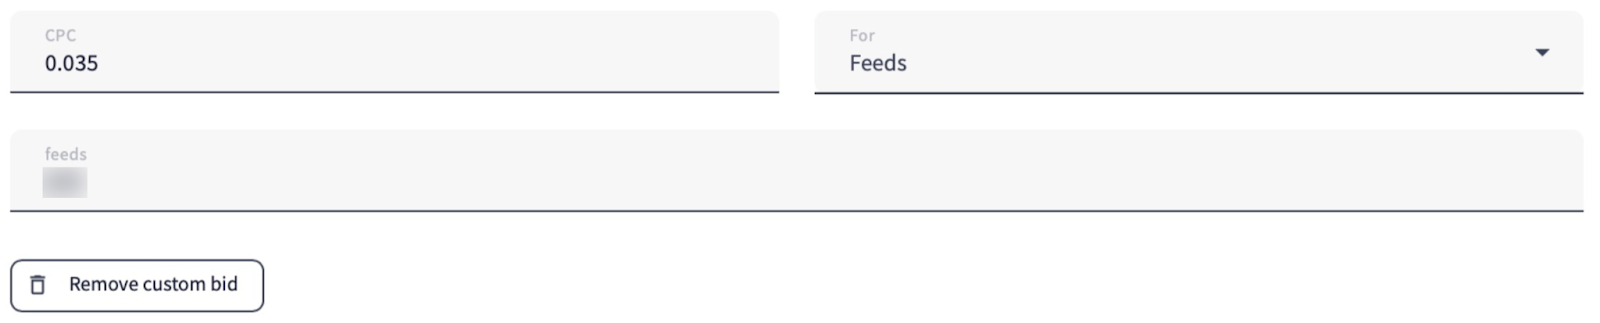
2. We also increased the bid for the tick-marked feed to attract more traffic from it.
Day 2
We checked the results of the feeds with custom bids.

The tick-marked feed with the increased bid failed to generate any conversions, so we reverted the bid to its previous value.

But the star-marked feed with the lower custom bid, on the contrary, turned a profit, so we kept the bid, as it was clearly a good fit.
After setting the sampling period to 2 days, we saw that the second feed in terms of traffic volume also didn’t generate any conversions, so we switched it off without hesitation.

We also noticed that one OS version was driving the majority of the traffic. We added it to the targets to avoid losing clicks on other versions, which generated less traffic and no conversions.

Day 3
Going back to feed performance, we identified two top-performing feeds and increased their custom bids to $0.04.

Day 4
We selected the full traffic period to evaluate zone performance overall. What we saw was that zones with higher traffic volumes generated most of the conversions. So, we decided to keep the zones with lower traffic as well, aiming to potentially capture additional conversions from them.

Day 5
During this day, we didn’t make any adjustments—we simply waited for the remaining traffic to come in.
Results time
Here are the results we got in the tracker after 5 days of campaign running:
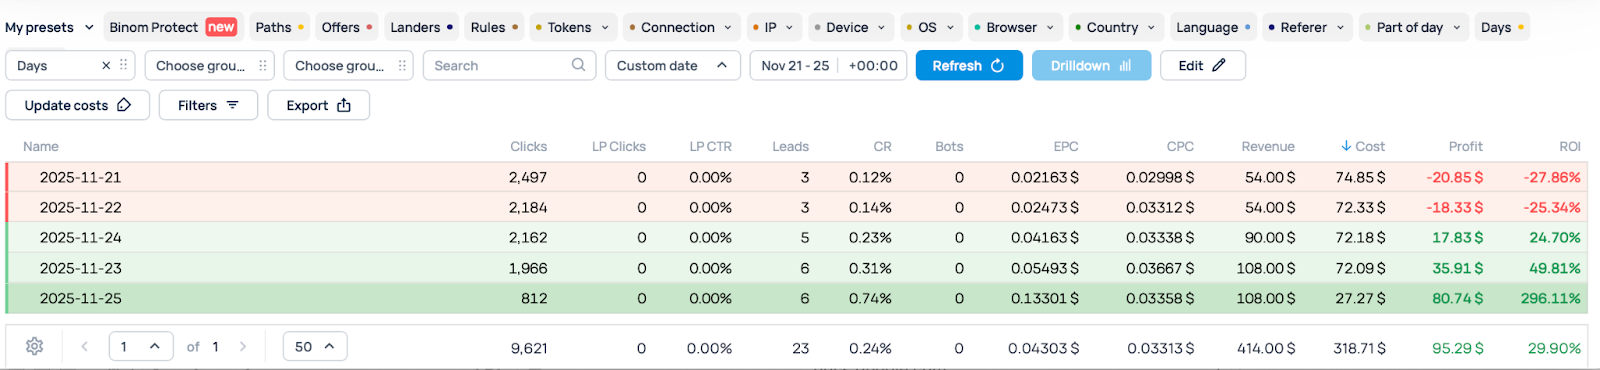
But we should always keep in mind the possibility of discrepancy—a slight difference between tracker data and platform data. To maintain statistical accuracy, we’ll take into account the platform’s metrics too:

All in all, the campaign turned a profit, and even more importantly, it only took us minutes to launch and optimize. Thanks to the campaign kit, all the heavy lifting was already done—bids, traffic presets, and zone selections were pre-configured by our experts. This meant we could skip the usual trial-and-error setup and focus immediately on fine-tuning performance, saving time and maximizing our revenue from day one.
Cost: $349.34
Revenue: $414.00
Profit: $64.66
ROI: 18.5%
In closing
Campaign kits are useful not only for newcomers to affiliate marketing but also for experienced players exploring new territory. With these kits, the process of launching becomes much easier—and the optimization phase becomes much smoother (though still necessary).
By providing pre-tested traffic presets, recommended bids, and all the key campaign settings, campaign kits remove the uncertainty and help you focus on scaling your performance and maximizing revenue.
We regularly release new kits, so don’t forget to subscribe to our social media channels you see below to stay updated. And if you have any remaining questions, feel free to reach out to our support team in the platform chat.
Easy launching!