We can’t get enough of showing you the power of the Direct Click ad format—one of our top performers lately. This time, we want to highlight its performance when paired with mobile utilities (iOS specifically).
But before we dive into the step-by-step process, let us quickly remind you of the format itself and the previous cases we’ve published, so you have a more complete view of Direct Click and its capabilities.
Direct Click: Refreshing facts
At RollerAds, Direct Click combines high-intent traffic sources into a powerful conversion engine, including survey exit traffic, domain redirects, and high-engagement button clicks. This isn’t just traffic—it’s pre-qualified, ready-to-convert users who move naturally from intent to offer without interruptions.
On our blog, we’ve already published several case studies highlighting the potential of Direct Click. Here they are:
Direct Click & testing VPN offers
Check them out if you haven’t seen them yet, and let’s move on to the new case study this article is dedicated to.
Case study: Direct Click & mobile utilities
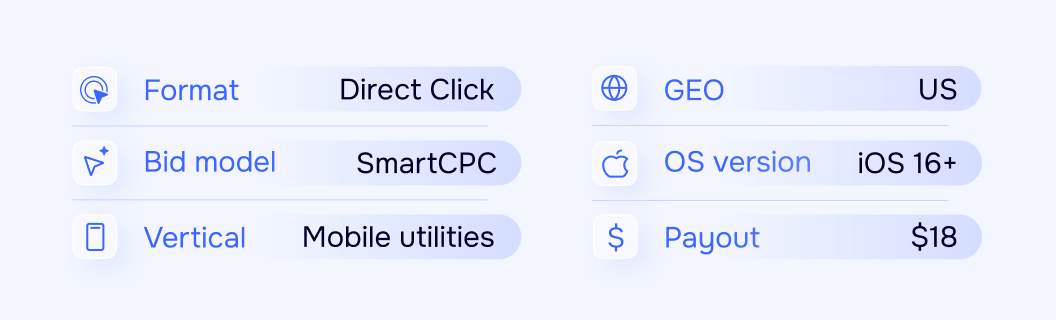
After selecting a suitable offer, we were ready to start a campaign with the following parameters.
Let the launch begin
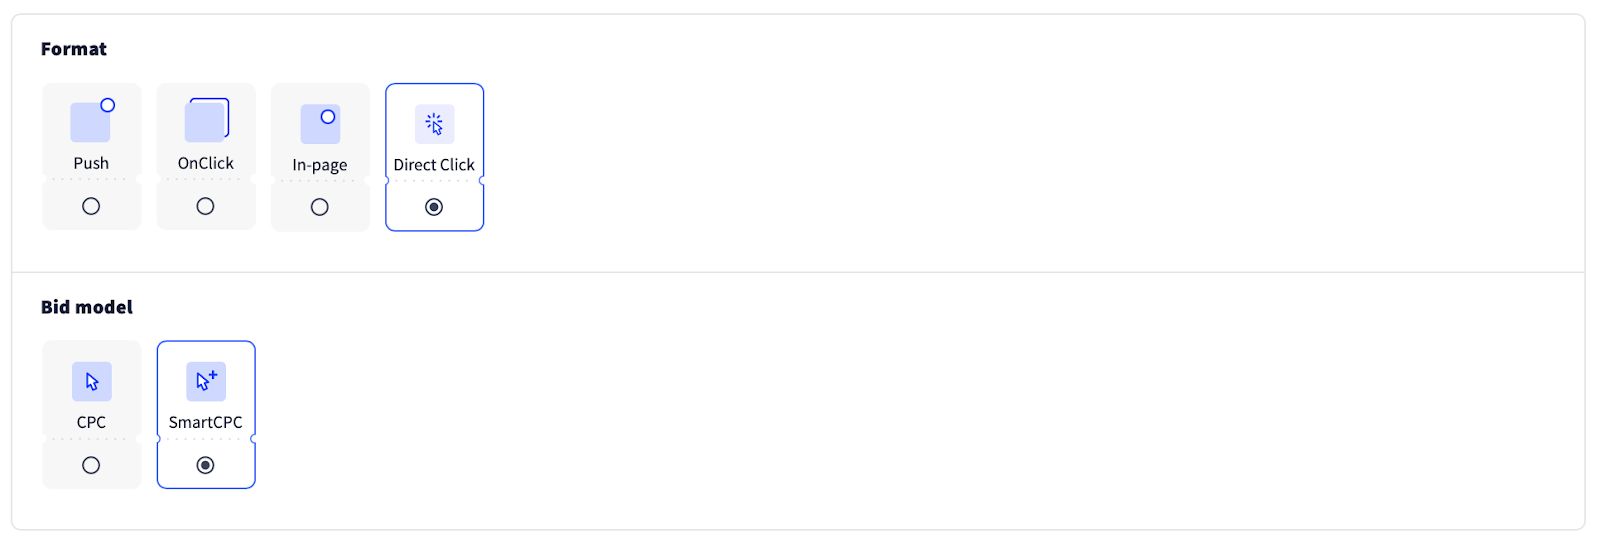
We picked the required ad format and bid model.
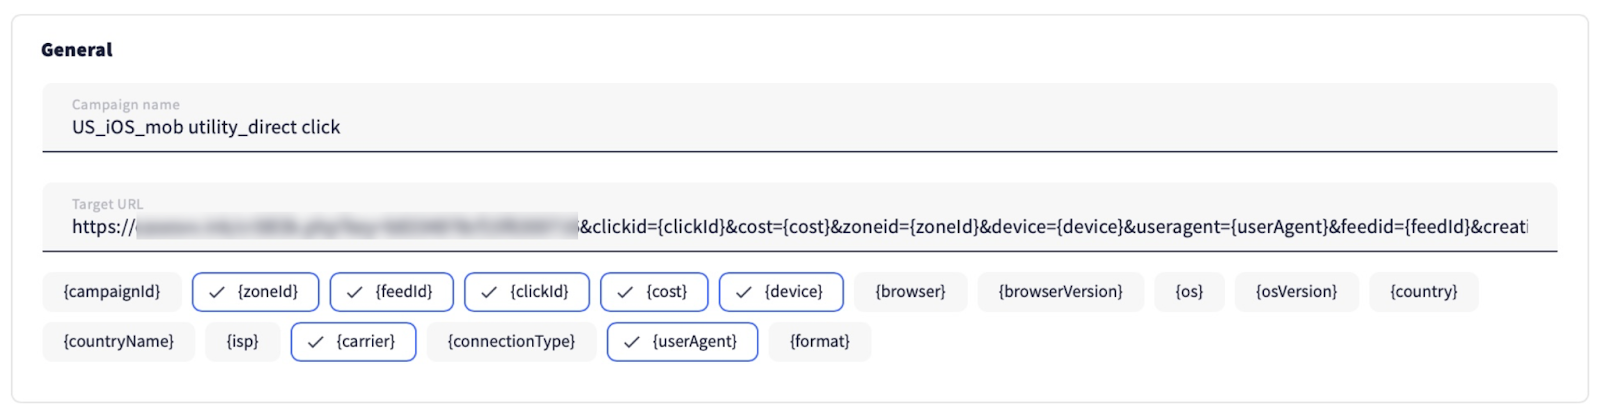
Then we entered the campaign name and URL.
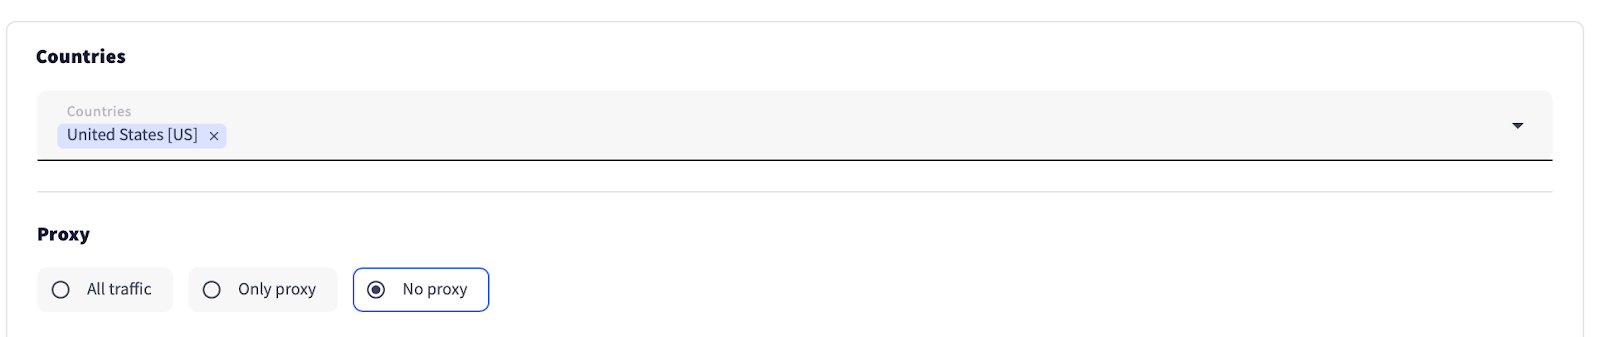
According to the offer’s KPI, we selected the targeted GEO and disabled proxy traffic.
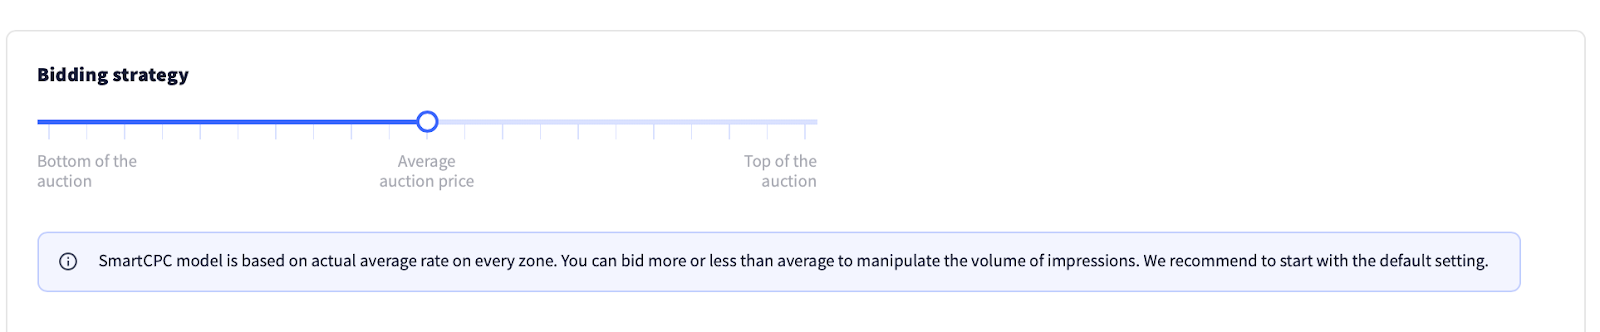
We kept the bid strategy slider in the middle of the auction by default, without capping the maximum bid.
Don’t forget to set a daily and total budget (if included in your plan).

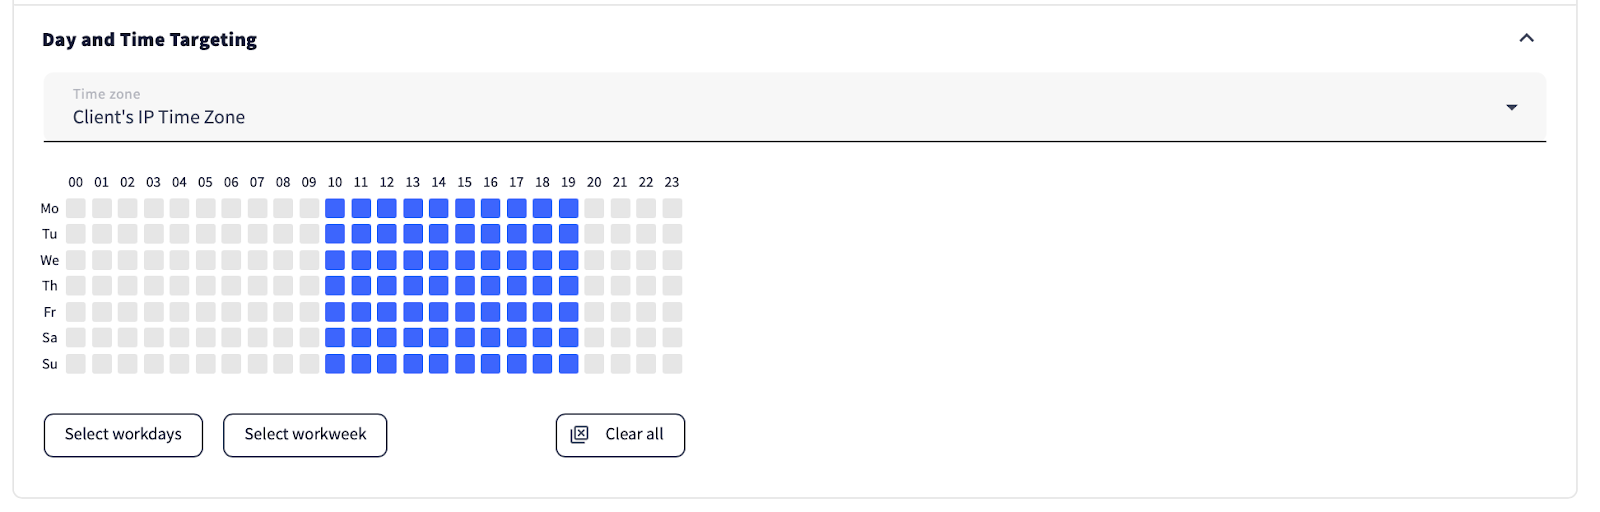
Based on previous experience testing this offer, we know it performs best with time targeting from 10 am to 7 pm client’s time zone—that’s why we applied the same schedule for this campaign.
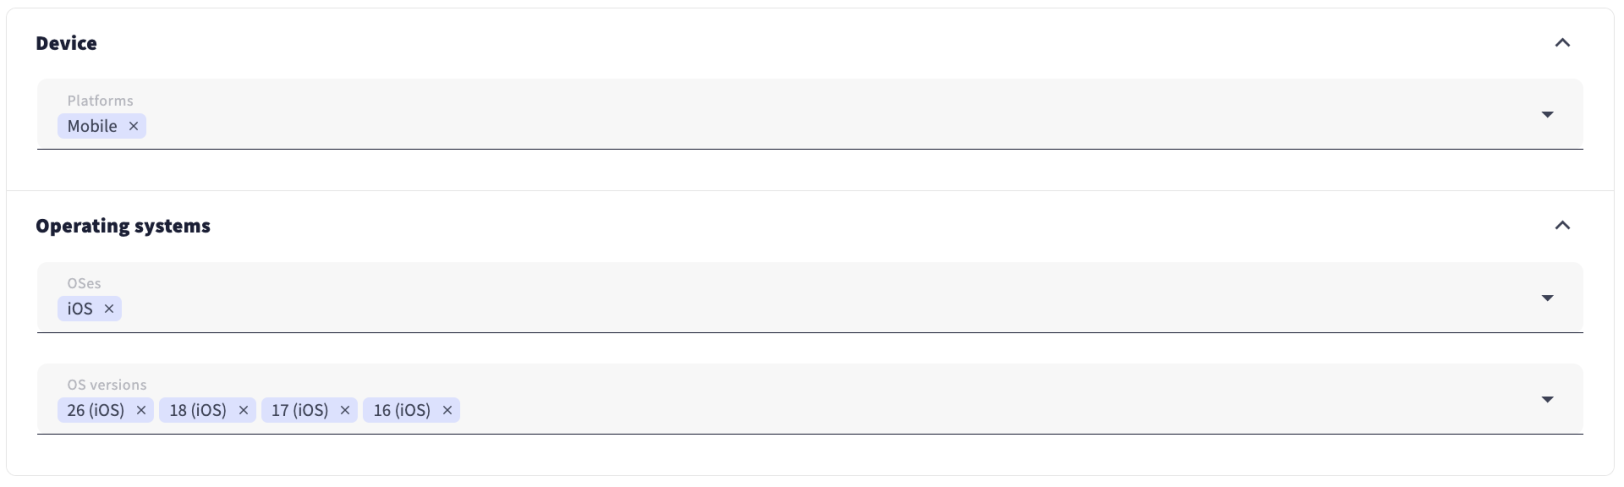
We also set targeting by device, OS, and OS version as indicated in the offer.
Finally, we saved the campaign and submitted it for moderation.

On to the optimization phase
Day 1
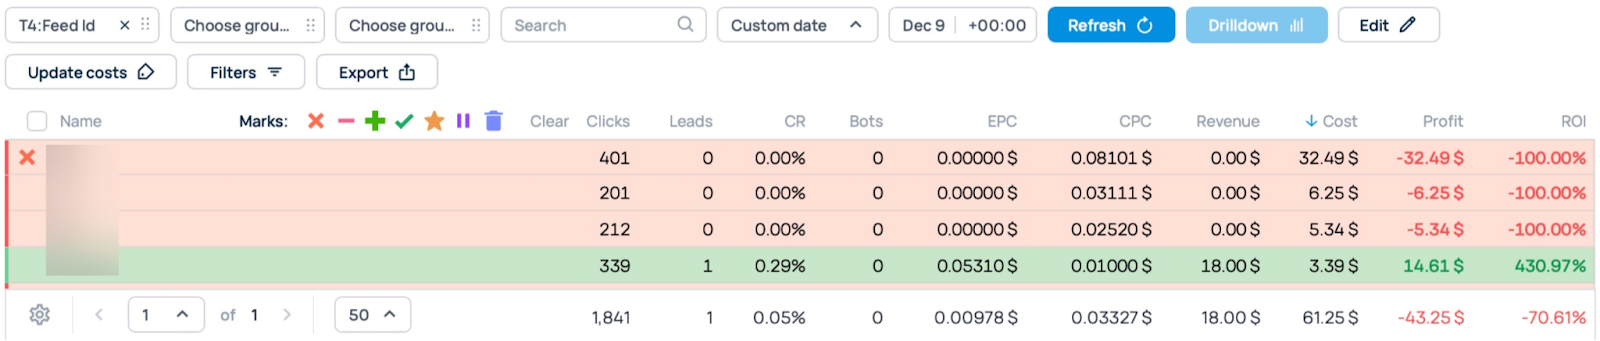
Right after our campaign was approved, we rolled up our sleeves and began fine-tuning its performance. Just a couple of hours after the campaign started running, we noticed one costly feed wasn’t covering its costs, so we decided to block it.
Day 2
We optimized the campaign by zones, following the usual approach—disabling zones that overspent the conversion cost but failed to bring any results.

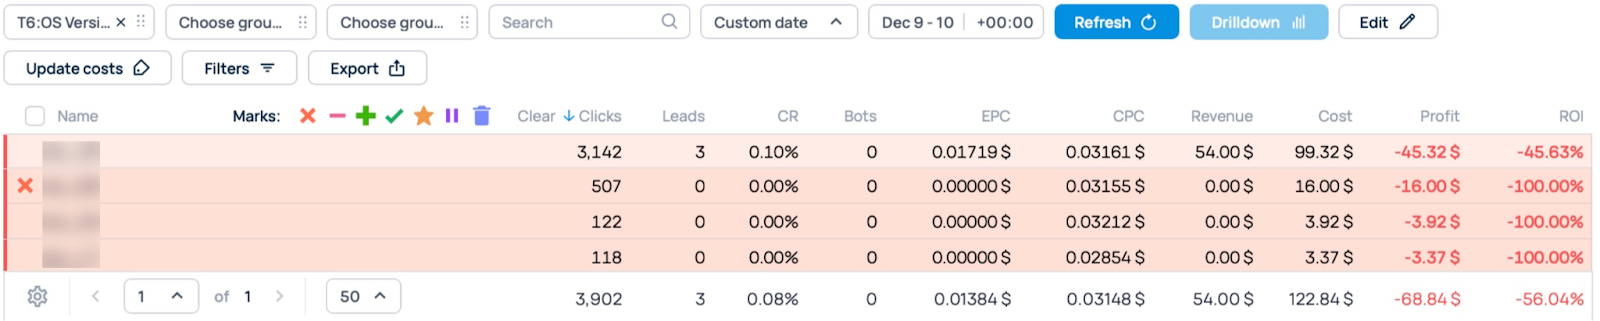
Then we continued by optimizing OS versions. We noticed that one of them not only brought insufficient traffic but also failed to generate any conversions, spending $16. We blocked it immediately.
Day 3
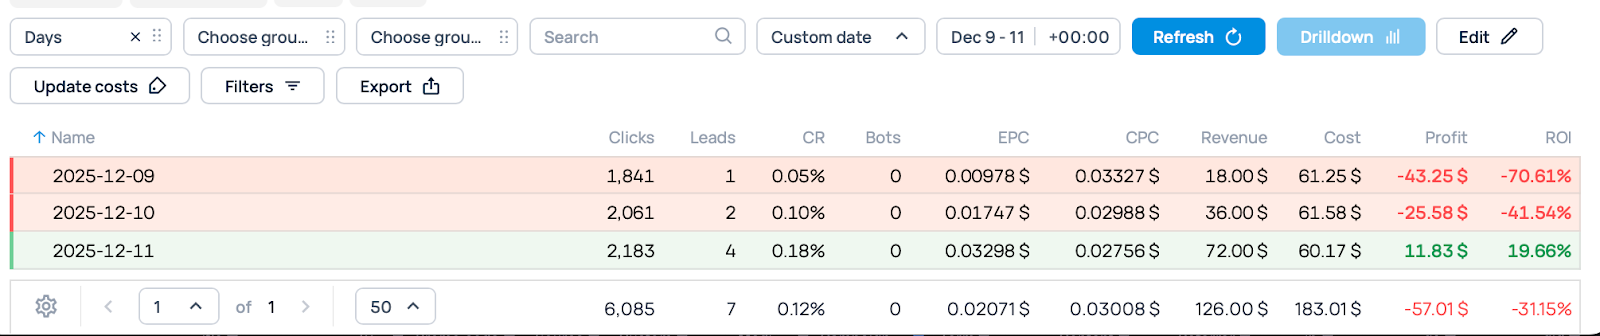
Thanks to optimization, we managed to push our campaign into the green zone.
Having decided to get more traffic from the well-performing zones (marked with a check below), we set custom bids for each of them.
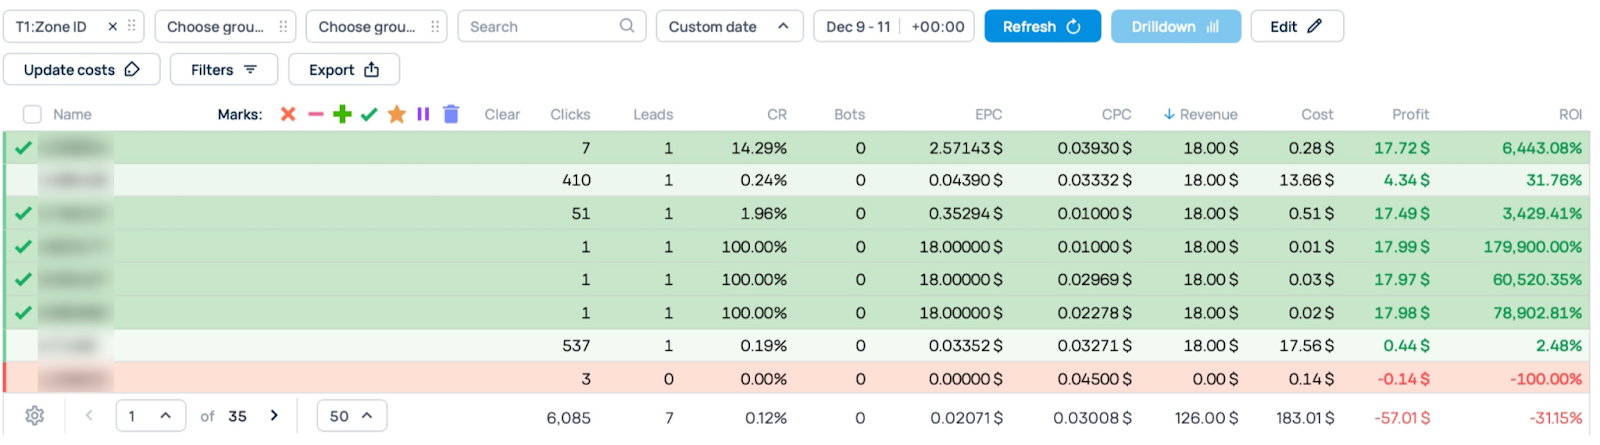
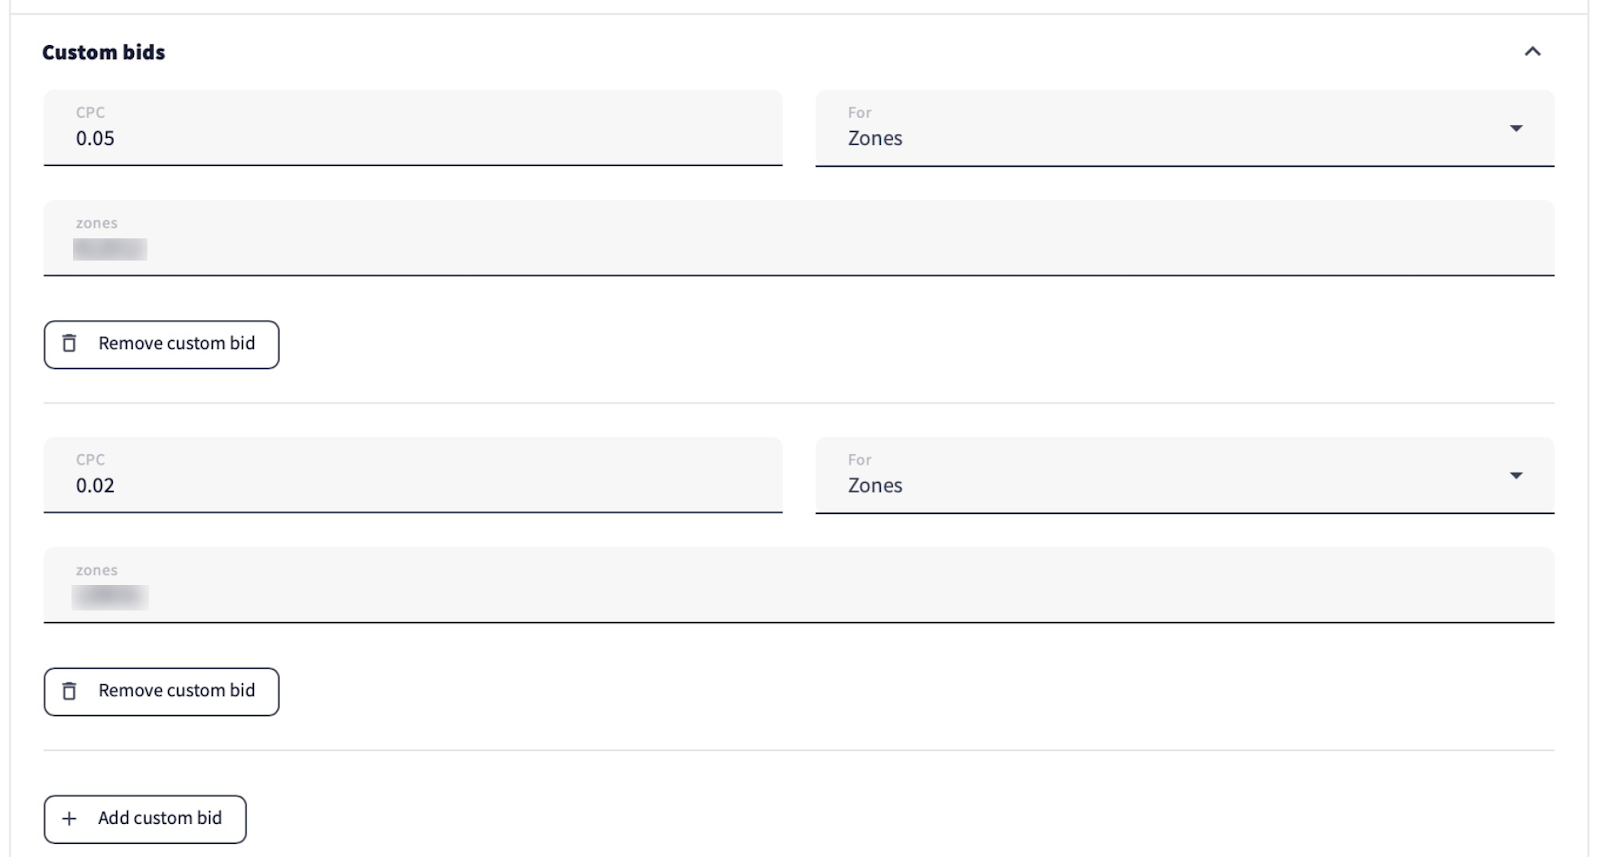
Following our settings (we used the SmartCPC bid model and kept the slider in the middle of the auction), the model selected the average bids for each zone. By setting custom bids, we could get more traffic from the zones these bids were applied to. We set the bids slightly higher than before.
Day 4
We kept blocking non-performing zones.

After adjusting the selected dates (from the campaign start to day 4), we saw that although some zones brought conversions, they were still in the red (marked with stars in the screenshot below). That’s why we decided to apply slightly lower custom bids to them.


Day 5
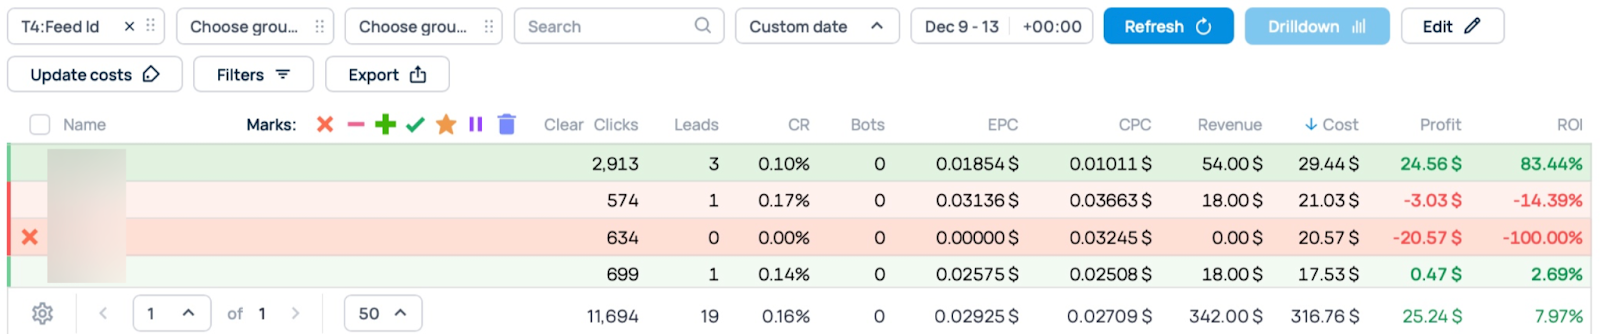
We continued optimizing by feeds. After 5 days of campaign running, one feed failed to bring any conversions, so it was removed from the campaign.
Day 6
On the last day, we didn’t make any optimizations—just kept a close eye on the campaign, which was performing well without our intervention.
Results time
After six days of running the campaign, the results were as follows:
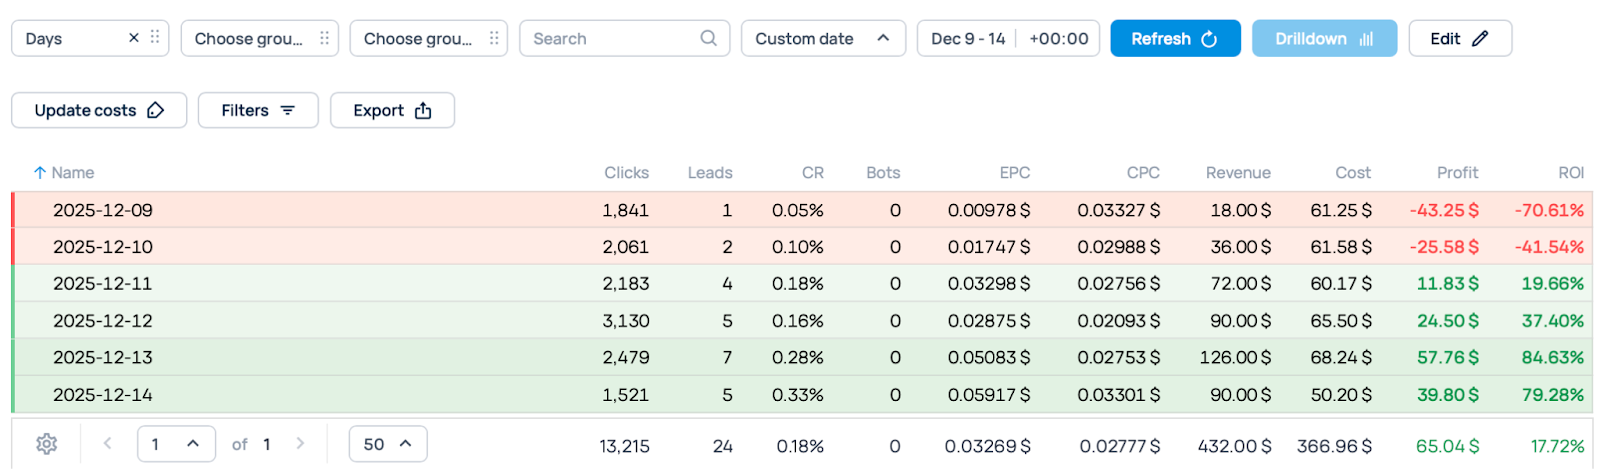
It’s always important to compare the tracker and platform results, as discrepancies in clicks and impressions do occur.
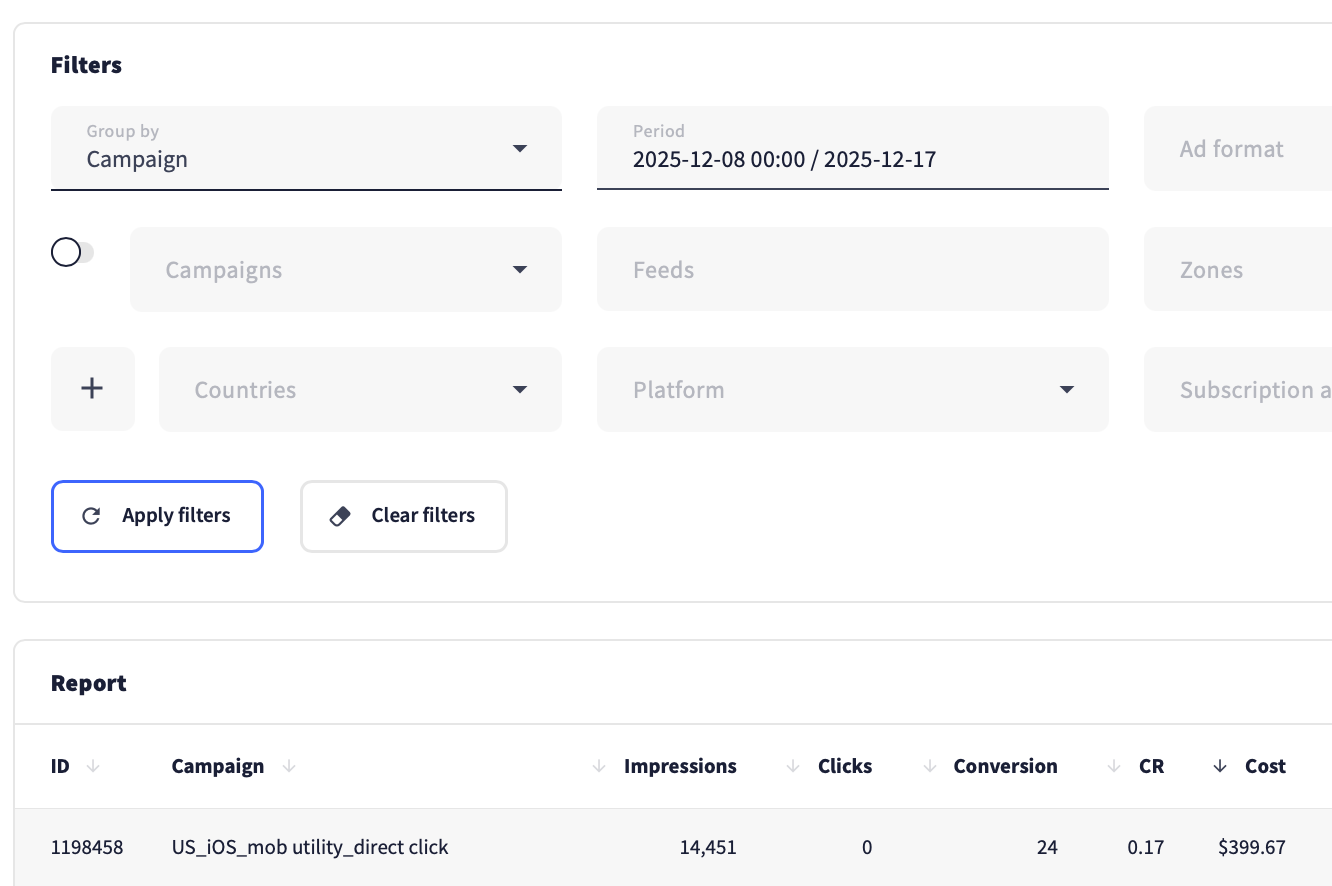
With all that in mind, here are the results our campaign brought.
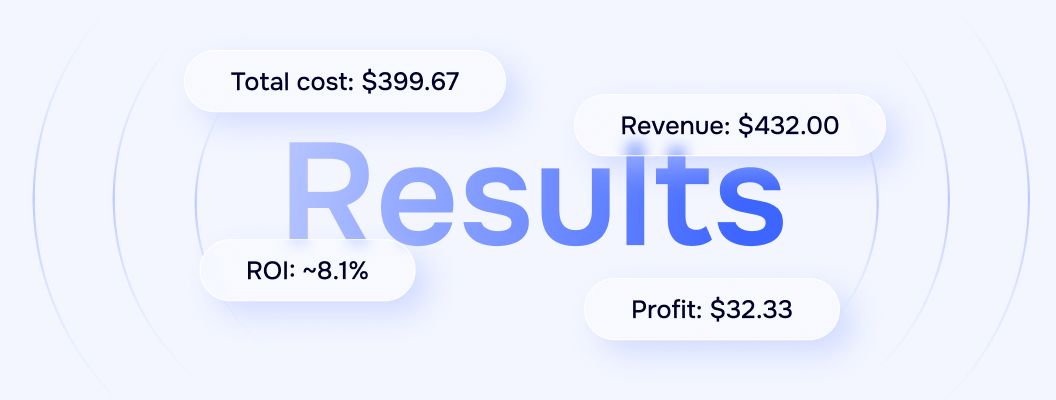
Wrapping up
In this case, we demonstrated the set of actions and approaches we use for each campaign. Even though the campaign lasted six days, we didn’t spend much time on optimization—just a few minutes a day. Now, imagine running this campaign longer or launching several more campaigns at the same time—your profit could rise exponentially based on your input. This is just the starting point—something that can help you test the waters and start earning as an advertiser.
If you have any questions, feel free to contact us via the in-platform chat. And if you have ideas or want us to run a case study on a specific topic, do the same—send your ideas to our support team, and they will deliver them to the right team. We wish you successful scaling and big profits!